
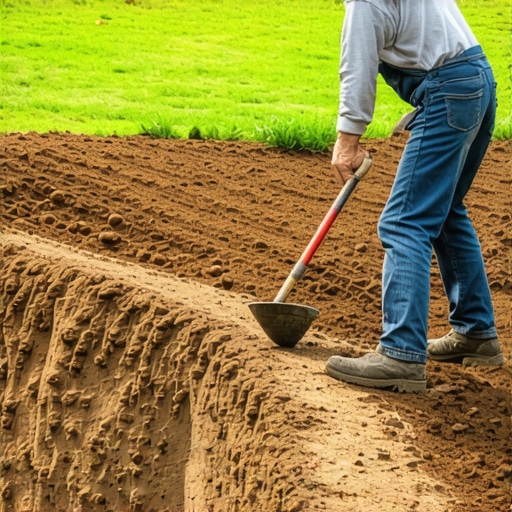
I always drill into my new crew members: if you don’t fix the soil grading first, every plant you put in the ground is just expensive compost. Most rookie contractors think they can just roll out a green carpet on a 30-degree incline and hope for the best. They are wrong. Without mechanical stabilization and a deep understanding of soil shear strength, that $5,000 sod install will be a muddy heap at the bottom of the hill after the first heavy rain. Gravity never sleeps. To successfully lay sod on a steep hill, you must use landscape staples, orient the rolls horizontally across the slope, and utilize a staggered brick-like pattern to prevent erosion. Proper site preparation and soil-to-root contact are non-negotiable for ensuring the turf anchors before gravity pulls it down. [image_placeholder_1]
The Physics of Slope Failure: Why Yard Cleanup Matters
To prevent sod from sliding, you must first address the structural integrity of the subgrade and remove any organic debris that could create a slip-plane between the soil and the new turf. If you leave old thatch, sticks, or loose leaves under your new sod, you are effectively placing it on a bed of ball bearings. Professional yard cleanup is not about aesthetics; it is about exposing the raw mineral soil so the roots have an immediate path to penetrate. We look for the angle of repose. If your slope exceeds 35 degrees, sod alone might not cut it without geogrids, but for most residential hills, mechanical pinning is the answer.
“A retaining wall doesn’t fail because of the stone; it fails because of the water trapped behind it.” – Hardscape Engineering Axiom
This principle applies to sod too. Water flowing underneath the sod creates hydrostatic pressure that lifts the grass and sends it sliding.
How do I prep the soil for a steep slope sod install?
The soil surface must be scarified to a depth of 2 inches using a hard rake or a power harley-rake to break up surface tension and allow for immediate root migration. If the soil is compacted clay, your sod will sit on top like a wet blanket on a slide. We use a 10-10-10 starter fertilizer high in phosphorus to stimulate root-zone expansion.
The Installation Blueprint: Running Stretcher Bonds
For a stable sod install on an incline, you must treat the sod rolls like bricks in a wall, staggering the vertical seams so that water cannot create a continuous channel (a ‘rill’) down the hill. Start at the bottom of the hill. This provides a physical base for the next row to rest against. Lay the rolls perpendicular to the direction of the slope. Never lay them vertically. If you lay them vertically, every seam becomes a mini-drainage ditch that will wash out your soil.
Should I use sod staples on a hill?
Yes, you must use 6-inch or 8-inch steel sod staples, driven in at an angle against the slope, with at least 2 to 3 staples per square yard to pin the sod to the subgrade. In high-velocity runoff areas, we use 11-gauge steel. Do not use the cheap 4-inch plastic stakes from big-box stores. They have no grip.
| Material Type | Best Use Case | Pros | Cons |
|---|---|---|---|
| 6-inch Steel Staples | Standard 2:1 Slopes | High friction, cheap | Can rust over time |
| Biodegradable Pegs | Eco-sensitive zones | No metal in soil | Lower shear strength |
| Wood Stakes (12-inch) | Extreme 1.5:1 Slopes | Maximum depth | Visible until grass grows |
| Jute Matting Overlay | Ultra-steep/High Flow | Zero erosion | Expensive material cost |
Managing Irrigation and Hydrostatic Pressure
Proper irrigation on a slope requires cycle-and-soak programming to prevent runoff while ensuring the water reaches the root flare without oversaturating the soil-sod interface. Water follows the path of least resistance. On a hill, that path is down. If you run your sprinklers for 30 minutes straight, the top of the hill stays dry while the bottom becomes a swamp.
“The maximum slope for turfgrass establishment without specialized reinforcement is typically 3:1 to ensure adequate moisture retention and mower safety.” – Texas A&M AgriLife Extension
Use low-precipitation rate nozzles (like MP Rotators) to apply water slowly. This allows the soil to absorb the moisture through capillary action. Don’t skip the rolling phase. Use a weighted lawn roller (half-filled with water) to press the sod into the soil. Air pockets are the enemy of rooting.
The Professional Grading Checklist
- Utility Locate: Call 811 before any excavation or deep staking.
- Vegetation Removal: Strip all existing weeds and old turf to expose mineral soil.
- Soil Amendment: Incorporate compost if Cation Exchange Capacity (CEC) is low.
- Mechanical Keying: Cut a small ‘bench’ or trench at the toe of the slope.
- Staple Pattern: Use a ‘W’ pattern for staple placement for maximum grip.
- Initial Saturation: Water within 30 minutes of laying the first piece.
How long does it take for sod to root on a hill?
Under ideal conditions with temperatures between 60-80°F, sod will begin to knit into the subgrade within 10 to 14 days, but you should not remove staples for at least 4 to 6 weeks. Pulling staples too early can result in ‘sod heave’ during heavy winds or rain. Test the rooting by gently tugging on a corner. If it resists, the roots are doing their job.
Landscaping for Long-Term Stability
Beyond just the grass, your landscaping plan should include diversion swales at the top of the hill to redirect heavy watershed around the sodded area rather than over it. If you have a massive roof line dumping water into a gutter that hits the top of the slope, no amount of staples will save you. Extend those downspouts. Bury them in a 4-inch PVC pipe and daylight them at the bottom of the hill. It is basic civil engineering. Maintain the height. Never scalp the grass on a hill. Keep it at 3.5 to 4 inches to increase the evapotranspiration rate and keep the root system deep. Short grass equals short roots. Short roots equal sliding sod.