
The Forensic Autopsy: Why Your Irrigation System is Bleeding Out
The ground doesn’t lie, and right now, your lawn is screaming. Repairing 2026 underground irrigation pipe punctures requires a precise identification of pipe material (PVC vs. Poly), a surgical excavation to prevent soil contamination, and a high-pressure solvent weld or mechanical coupling to restore system PSI. Most homeowners realize there is a problem only after a massive spike in the water bill or the appearance of a ‘sponge-zone’ in the turf. This isn’t just a nuisance; it’s an engineering failure that erodes the subgrade and compromises the integrity of your landscaping. If you ignore a lateral line puncture, you’re not just wasting water—you’re washing away the very foundation of your yard. Don’t let a simple puncture turn into a full-scale excavation project.
The $12,000 Puddle: A Hardscape Autopsy
I recently got called out to tear up a $30,000 patio that was sinking because the previous contractor failed to properly sleeve the irrigation lines running beneath the pavers. A small puncture, likely from a stray shovel during the final yard cleanup, had been weeping for months. That tiny hole turned the modified gravel base into a slurry of mud. The hydrostatic pressure eventually forced the water upward, popping the polymeric sand out of the joints and causing the 60mm pavers to settle by nearly three inches. We had to lift 400 square feet of stone just to fix a $2 piece of PVC. It was a complete disaster. This is why I tell my crew: an irrigation repair is not a ‘patch job.’ It is a structural restoration. If you don’t treat the pipe as a pressurized vessel, you’re just waiting for the next failure.
“A retaining wall doesn’t fail because of the stone; it fails because of the water trapped behind it.” – Hardscape Engineering Axiom
The Physics of Irrigation Punctures
Most punctures occur during aggressive yard cleanup or new sod install. When a sod kicker or a power aerator hits a shallow lateral line, it doesn’t always cause a catastrophic burst. Often, it creates a hairline fracture or a ‘clamshell’ puncture. Under the 40 to 70 PSI typical of residential systems, that small breach becomes a high-velocity jet. This jet carves out a cavern in the soil, leading to localized sinkholes. You need to understand the material you are working with. Schedule 40 PVC is the gold standard for mainlines, while Class 200 is often used for laterals. Polyethylene (Poly) pipe, common in colder climates for its freeze-thaw resilience, requires entirely different repair protocols involving stainless steel ear clamps and barbed insert fittings. Do not mix these up. You cannot solvent-weld Poly pipe, and you shouldn’t use compression fittings on Schedule 40 if you want a permanent fix.
| Pipe Material | Standard PSI Rating | Common Failure Point | Repair Method |
|---|---|---|---|
| Schedule 40 PVC | 280-450 PSI | Brittle fractures/Impact | Solvent Weld / Slip Fix |
| Class 200 PVC | 200 PSI | Thin wall collapse | Telescoping Coupling |
| HDPE (Poly) | 80-160 PSI | Puncture/Kink | Barb Fittings + Clamps |
How do you find a leak in an underground sprinkler line?
Finding a puncture in a 2026-era system starts with a zone-by-zone pressure test to isolate the breach. Locate the leak by looking for bubbles in saturated soil, using a mechanical stethoscope on the valve body to hear the hiss of escaping air, or checking for localized ‘die-back’ in the turf where the soil has become anaerobic. If the leak is under a new sod install, you may see ‘mushy’ sections where the roots are literally drowning. Turn off the main shut-off valve immediately to prevent further subgrade erosion. I’ve seen guys leave these leaks running for weeks; by the time they call me, the soil chemistry is so far gone from leaching that we have to replace the top six inches of loam just to get anything to grow again.
Step-by-Step Restoration Protocol
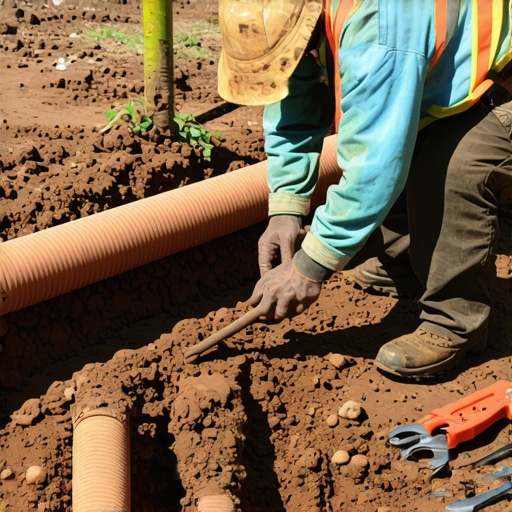
First, excavate a ‘window’ at least 12 inches wide and 6 inches deep around the puncture. You need room to work without getting mud into the pipe. If you get dirt in the line, you’ll blow out every nozzle in the zone later. Second, cut out the damaged section using a ratcheting PVC cutter. A hacksaw is for amateurs—it leaves burrs that cause turbulence and future clogs. Third, use a primer. I don’t care if the ‘all-in-one’ glue says you don’t need it. The primer chemically softens the plastic, allowing the solvent to create a true molecular bond. Fourth, use a ‘Slip-Fix’ or telescoping coupling for PVC repairs. This allows you to bridge the gap without having to flex the existing pipe, which often leads to stress fractures down the line.
Can I use a slip fix for irrigation repair?
Yes, a telescoping slip fix is the professional choice for repairing localized punctures in PVC irrigation lines. Ensure the pipe ends are square and deburred, apply a generous layer of P-70 primer followed by 711 heavy-duty solvent cement, and fully extend the slip fix into the receiving end while the glue is still wet. Hold it for 30 seconds. Do not pressure test for at least two hours. If you turn the water on too soon, the high pressure will ‘hydro-plane’ the glue right out of the joint. I’ve seen it happen a hundred times. Patience is the difference between a 20-year repair and a 20-minute failure.
“Irrigation efficiency is dictated by the weakest link in the hydraulic chain; a single 1/8th inch puncture can waste 3,000 gallons of water per month.” – National Agronomy Manual
Critical Checklist for Post-Repair System Audits
- Pressure Recovery: Verify that the zone reaches its design PSI within 5 seconds of activation.
- Nozzle Flush: Remove the last head on the run and flush the line to clear any construction debris.
- Compaction Check: Hand-tamp the backfill in 2-inch lifts to prevent the ‘repair hump’ after sod install.
- Saturation Timing: Adjust your controller to compensate for the saturated repair area until soil moisture levels stabilize.
Integration with Landscaping and Sod Installation
When you are laying new sod or doing a major yard cleanup, you are in the high-danger zone for punctures. If you’re using a power sod cutter, you must flag every single head and know the depth of your lines. Most residential lines are only 6 to 10 inches deep. That’s not much margin for error. If you find a puncture after the sod is down, don’t just cut a hole in the grass. Carefully peel back a section of the sod at the seam, perform the repair, and then meticulously pack the soil back down. If you leave an air pocket under the sod, the grass will dry out and die, regardless of how much water is in the ground. Compaction is key. The soil should be firm enough that your thumb doesn’t sink in more than half an inch. It will rot if you leave it too loose and wet. Repairing 2026 systems isn’t just about the pipe; it’s about the ecosystem you’ve built around it.