
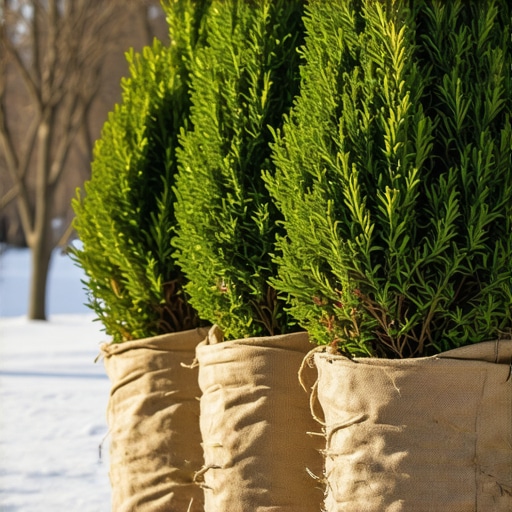
What is Winter Burn and Why Does It Kill Boxwoods?
Winter burn on boxwoods is a physiological drought condition where the plant’s vascular system fails to replace moisture lost through the leaves. This desiccation occurs because the soil is frozen, preventing the roots from absorbing water, while cold winds and winter sun force the stomata to remain open. It results in brown, brittle foliage and permanent branch dieback. It will kill your hedges if left unmanaged.
I always drill into my new crew members: if you do not fix the soil hydration and protection levels first, every plant you put in the ground is just expensive compost. Last season, I walked onto a property where a homeowner had spent four thousand dollars on Green Mountain boxwoods in May, only to have them look like toasted marshmallows by March. They didn’t listen when I told them about the wind tunnel effect on the north side of their house. They thought ‘landscaping’ was just about the summer look. It isn’t. It is about biological survival through the freeze-thaw cycles. If you ignore the mechanical protection of your evergreens, you are throwing money into a chipper. Engineering a winter-safe environment requires more than just throwing an old blanket over a shrub. You need to understand the physics of transpiration.
“Boxwood winter bronzing occurs when the rate of transpiration exceeds the rate of water uptake from frozen soil. This is often exacerbated by high-velocity winds that strip the boundary layer of moisture from the leaf surface.” – University of Illinois Extension
The Planning Phase: Why 80% of the Work Happens Before the Frost
Successful winter protection starts with the site analysis. You have to look at the yard cleanup through the lens of wind patterns and solar exposure. Boxwoods (Buxus genus) are particularly susceptible to the ‘winter sun’ which warms the leaf tissue and triggers metabolic activity in the middle of January. When the sun sets and temperatures plummet, the cells rupture. This is why you see damage primarily on the south and southwest sides of the plant. Before you even touch a roll of burlap, you must assess the drainage and soil compaction. High hydrostatic pressure in the soil can lead to root rot during the spring thaw, which mimics the symptoms of winter burn. You must ensure your irrigation system is blown out correctly, but not before a final, deep-root saturation. We are looking for a soil moisture tension that allows for maximum hydration of the xylem before the ground reaches a hard freeze.
How much burlap do I need for boxwood protection?
To properly wrap boxwoods, you need enough 7-ounce natural burlap to create a double-layered screen that stands 6 inches taller than the plant and 12 inches wider. This ensures you can create a micro-climate buffer that prevents the fabric from touching the foliage directly. Do not skip the measurement phase. If the burlap touches the leaves, it can wick moisture away from the plant or cause ice to form directly on the tissue. You also need heavy-duty wooden stakes, preferably 2×2 oak, to withstand the lateral load of winter wind. Cheap pine stakes will snap at the first sign of a Nor’easter.
Is winter burn on boxwoods permanent?
Whether winter burn is permanent depends on the depth of the damage to the cambium layer. If the browning is limited to the outer foliage, the plant may recover during the spring flush. However, if the stems are brittle and the inner wood is dry and tan rather than green, that section is dead. You cannot ‘revive’ dead wood. Proper yard cleanup in the spring involves pruning back to live tissue, but your goal should be 100% prevention. Once a boxwood is stressed by winter burn, it becomes a magnet for pathogens like Volutella buxi or Boxwood Blight.
The Burlap Tactic: An Engineering Approach to Protection
Forget the ‘mummy wrap.’ We don’t wrap the plant like a gift; we build a structural windbreak. This is the difference between a hack and a professional horticulturist. You want to create a chimney effect that allows for airflow while blocking the desiccating wind. The process starts with driving your oak stakes at least 12 inches into the ground outside the drip line. If you are doing a sod install nearby, be careful not to disturb the new root mat. Use a sledgehammer to ensure they are seated. The stakes should be positioned on the windward side or around the entire perimeter for sensitive English Boxwoods.
| Material Type | Porosity Level | Thermal Retention | Durability |
|---|---|---|---|
| 7oz Natural Burlap | High (Good Airflow) | Moderate | Single Season |
| Synthetic Shrub Covers | Low | High (Risky) | Multi-Season |
| Plastic Sheeting | Zero (Lethal) | Extreme | Non-applicable |
Once the stakes are set, staple the burlap to the first stake, pull it taut, and move to the next. Leave a gap of at least 3 inches between the foliage and the burlap. This gap is the most critical part of the tactic. It acts as an insulating layer of ‘dead air.’ If you wrap it tight, you create a greenhouse that will cook the plant during a sunny February day. It will rot. I have seen entire rows of boxwoods turned into mush because a contractor used plastic or wrapped them too tightly. Use heavy-duty staples or zip ties to secure the fabric. The bottom of the burlap should be 2 inches off the ground to allow for oxygen exchange with the soil surface and to prevent rodents from nesting in the base of your hedge.
“The use of burlap screens reduces wind velocity and limits the solar radiation that triggers mid-winter transpiration, which is the primary cause of broadleaf evergreen mortality.” – USDA Forest Service Engineering Manual
- Step 1: Deep-water the root zone with 1 inch of water per week until the first hard freeze.
- Step 2: Apply a 2-to-3-inch layer of clean, hardwood mulch to regulate soil temperature. No mulch volcanoes.
- Step 3: Drive 2×2 oak stakes 12 inches deep, spaced 3 feet apart around the hedge.
- Step 4: Secure 7oz burlap to the stakes, maintaining a 3-inch air gap from the foliage.
- Step 5: Inspect monthly to ensure wind hasn’t collapsed the structure.
Irrigation and Soil Microbiology: The Hidden Factors
Your irrigation strategy in late October determines the survival rate in January. Many homeowners turn off their systems too early. You need the soil profile to be at field capacity when the freeze hits. Dry soil freezes deeper and faster than moist soil. This leads to ‘heaving,’ which can physically tear the fine feeder roots of a boxwood. While you are doing your final yard cleanup, check the pH. Boxwoods prefer a range of 6.5 to 7.2. If your soil is too acidic, the plant cannot efficiently uptake the potassium required for cell wall strength. Stronger cell walls mean better resistance to the mechanical stress of freezing. Do not apply high-nitrogen fertilizers after August. This stimulates soft, succulent growth that has zero chance of surviving a freeze. Focus on mycorrhizal inoculants to strengthen the root system instead.
The Settling-In Period: Monitoring Your Install
After the burlap is up, your job isn’t done. You have to watch for heavy snow loads. If snow accumulates on top of your burlap structure, it can collapse the stakes onto the plant, breaking the very branches you are trying to save. Use a broom to gently knock snow off the top. In early spring, do not be in a rush to remove the burlap. The most dangerous time for a boxwood is the first warm week of March followed by a sudden ‘Siberian Express’ cold front. Wait until the soil has thawed and the night temperatures are consistently above 32 degrees Fahrenheit. When you do remove it, do it on a cloudy day to prevent ‘light shock’ to the leaves that have been in the shade for four months. This is professional-grade care. It takes time. It takes effort. But it is the only way to ensure your landscape investment doesn’t end up in the municipal compost pile next spring.”,”image”:{“imagePrompt”:”A close-up high-quality photo of a professional landscape crew installing an oak stake and burlap windbreak around a row of boxwood shrubs. The burlap is taut and not touching the green leaves. Winter garden setting with some light frost on the ground.”,”imageTitle”:”Professional Burlap Windbreak Installation”,”imageAlt”:”Burlap screen protecting boxwoods from winter burn”},”categoryId”:1,”postTime”:”2023-10-27T08:00:00Z”}