
The Science of Sod Success: Why Most Installs Fail Before They Start
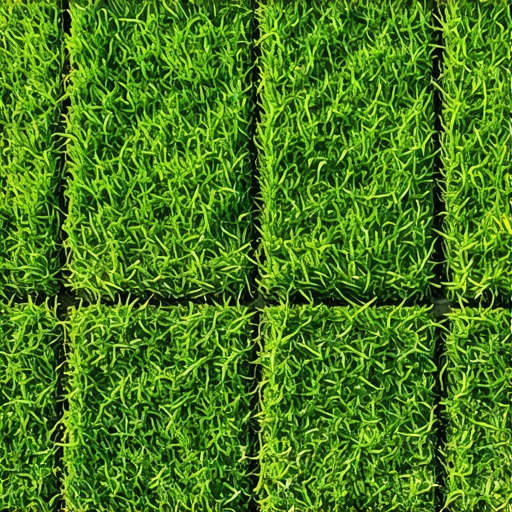
A successful sod install is not a weekend hobby; it is a high-stakes biological transplant that requires immediate integration between the turf’s root system and the native soil profile. The Overlap Rule refers to the precise method of butting sod edges so tightly together that they create a continuous moisture barrier, preventing the edges from drying out due to air exposure. Failing this step is the fastest way to turn a $5,000 investment into a yard full of brown, crispy rectangles. When you leave even a quarter-inch gap between rolls, you are inviting the wind to suck the moisture right out of the rhizomes. This leads to edge-desiccation, where the grass dies from the outside in before it ever has a chance to knit into the subsoil.
The Apprentice Lesson: Dirt Does Not Lie
I always drill into my new crew members: if you don’t fix the soil grading first, every plant you put in the ground is just expensive compost. I remember a kid named Danny back in ’08 who thought he could hide a three-inch dip in the grade by just laying the sod over it. Two weeks later, we had a miniature swamp in the middle of the lawn and the edges of the surrounding sod had curled up like burnt parchment because they weren’t making contact with the earth. Soil grading is the civil engineering of the backyard. You need a 1% to 2% slope away from the foundation. You need to kill the weeds, rake the rocks, and then: and only then: do you even think about the grass. A yard cleanup that ignores the top two inches of the soil sub-base is just a cosmetic distraction. If the soil is compacted to a high bulk density, the roots will simply sit on top and bake. We aim for a soil penetrometer reading of less than 200 PSI before the first roll hits the ground.
“Turfgrass establishment success is directly proportional to the moisture content maintained within the first 2 inches of the soil profile during the first 14 days.” – Agronomy Manual for Professional Turf Managers
The Mechanics of the Overlap Rule: Tight Seams Save Lawns
The Overlap Rule is a technical term for creating “compression seams” where each piece of sod is slightly pressurized against its neighbor to eliminate air pockets. While the name suggests stacking, you must never actually overlap the sod pieces like shingles; instead, you butt them together so firmly that the edges slightly “crown” upward, which you then settle with a water-filled roller. This ensures that the delicate root hairs are never exposed to the atmosphere. In landscaping, we call this creating a continuous canopy. If you see a gap, you have failed the install. The edges are the most vulnerable part of the sod because they have the highest surface-area-to-volume ratio, making them the first to lose turgor pressure and die off.
How much water does new sod actually need?
New sod requires approximately 1 inch of water per day split into multiple cycles to keep the soil-sod interface constantly moist without reaching a state of anaerobic saturation. You are not just watering the grass; you are maintaining the hydrostatic bond between the sod’s organic matter and the mineral soil below. Use a tuna can or a rain gauge to measure your irrigation output. If you are just “misting” the top, the roots will never dive deep into the soil. You need to force them to chase the moisture downward as the establishment period progresses. After the first 7 days, you should see white root initials poking into the soil. If they are brown or slimy, you have over-watered and triggered Pythium blight.
| Metric | New Sod Requirements | Established Turf Needs |
|---|---|---|
| Watering Frequency | 3-4 times daily (short bursts) | 2 times weekly (deep soak) |
| Fertilizer Type | High Phosphorus (Starter) | High Nitrogen (Maintenance) |
| Mowing Height | 3.0 to 3.5 inches (after 14 days) | 2.0 to 2.5 inches |
| Foot Traffic | Zero for 21 days | Moderate to High |
[IMAGE_PLACEHOLDER_1]
Why is my new sod turning yellow despite watering?
Yellowing in new sod usually indicates either a nitrogen deficiency or, more commonly, localized dry spots caused by poor soil contact or air gaps at the seams. If the soil was not properly amended with organic matter during the yard cleanup, the Cation Exchange Capacity (CEC) might be too low to hold onto the nutrients the grass needs to recover from the harvest stress. Also, check for “hydrophobic” soil conditions. If the water is pooling on top rather than sinking in, you need a surfactant or a wetting agent to break the surface tension. Don’t just throw more water at it; solve the absorption problem. A common mistake is using a high-nitrogen “turf builder” too early. You want a starter fertilizer with a ratio like 10-20-10 to encourage root elongation, not blade growth.
“A primary cause of sod failure is the failure to achieve intimate contact between the sod underside and the prepared soil surface, often exacerbated by gapping.” – Penn State Extension
The 30-Day Sod Establishment Checklist
- Day 1-7: Water 3 times daily. Keep the soil “spongy” but not a lake. No walking on it.
- Day 8-14: Reduce to 2 waterings daily. Check for root attachment by gently tugging a corner.
- Day 15: Perform the first mow. Set the deck at the highest setting. Ensure blades are razor sharp.
- Day 21: Apply a light application of potassium-rich fertilizer to harden the cell walls.
- Day 30: Transition to deep, infrequent watering (1 inch per week in a single session).
How do I know if I have the right soil pH for sod?
Before any sod install, you must conduct a soil test to ensure your pH is between 6.0 and 7.0, as nutrients like Phosphorus become chemically locked and unavailable to the plant outside this range. If your soil is too acidic (common in pine-heavy areas), you need to incorporate pelletized lime. If it is too alkaline, sulfur is your best friend. Do not just spread it on top; tilling it into the top 4 inches of the landscaping bed is the only way to ensure the chemistry is right where the roots will live. Most contractors skip this. They are the same ones who will tell you that the grass just “didn’t take.” The grass always takes if the chemistry is right and the seams are tight.
The Critical Role of Irrigation Calibration
Your irrigation system is the life support machine for your new lawn. If your heads are not set for “head-to-head” coverage, you will have dry rings. This is a matter of fluid dynamics and PSI. Most residential systems run at 30-50 PSI, but if you have too many heads on one zone, the pressure drops, the nozzles don’t atomize the water correctly, and your coverage becomes erratic. Check your nozzles for clogs during the first week. A single clogged grain of sand can kill a 5-square-foot patch of expensive fescue in 48 hours during a July heatwave. It is a binary game: either the water is there, or the grass dies. There is no middle ground in turf establishment.
Post-Install Compaction: The Roller Rule
Once the Overlap Rule has been applied and the seams are tight, you must use a lawn roller. A roller weighs several hundred pounds when filled with water, and its job is to push the sod into the soil, removing the micro-gaps of air that act as insulators. Without rolling, your roots are essentially trying to jump across a canyon to find food. Roll the lawn in two directions: once north-to-south, and once east-to-west. This ensures total contact across the entire sod install area. It is a physical requirement, not a suggestion. If the roller doesn’t squeeze a tiny bit of moisture out of the sod as it passes, you haven’t watered enough before rolling. Don’t skip this. It’s the difference between a lawn that lasts twenty years and one that peels up like a carpet in two months.