
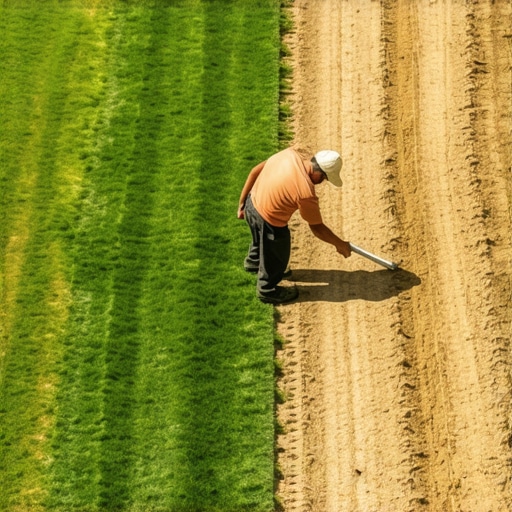
Why Most Hillside Sodding Projects Fail Before the First Mow
The secret to laying sod on a steep hill involves mechanical stabilization through sod staples, precise soil grading to prevent hydrostatic pressure, and a cycle-and-soak irrigation strategy that ensures moisture reaches the root zone without causing erosion or slippage. Without these engineering steps, gravity wins every time.
I always drill into my new crew members: if you don’t fix the soil grading first, every plant you put in the ground is just expensive compost. I remember a job three years ago in a high-density subdivision. The apprentice thought he could just roll out Kentucky Bluegrass on a 35-degree incline and let ‘nature’ do the work. By Tuesday, after a standard afternoon thunderstorm, half the backyard was sitting in the neighbor’s pool. He didn’t understand that sod on a slope isn’t just landscaping; it is a temporary erosion control blanket that needs to be anchored until the biology takes over. You have to treat the hillside like a structural element, not a canvas.
“A retaining wall doesn’t fail because of the stone; it fails because of the water trapped behind it.” – Hardscape Engineering Axiom
The Physics of Slope Preparation and Yard Cleanup
Before the first pallet of sod arrives, the site must be surgically prepared. This isn’t a basic yard cleanup. You are removing every twig, rock, and clump of old fescue that could create an air pocket. An air pocket under sod on a hill is a death sentence. It prevents the roots from knitting into the native soil and creates a channel for water to tunnel underneath, leading to ‘shearing’ where the entire sheet of grass slides off the hill. We use a heavy-duty power rake to achieve a consistent 1/4-inch tilth. If the soil is compacted clay, we core aerate first. The goal is a rough-textured surface that provides ‘tooth’ for the sod. Smooth soil is slippery soil. Check your pH levels now. If you’re below 6.0, your roots won’t move, and on a hill, lazy roots mean a failed install.
How do you stop sod from sliding down a hill?
Stopping sod from sliding requires 6-inch U-shaped metal staples and a staggered ‘brick-work’ laying pattern. By offsetting the seams, you break up the natural flow of water, preventing the formation of gullies. Each piece of sod must be laid perpendicular to the slope, never parallel. This creates a series of ‘checks’ that slow down runoff. Use at least three staples per square yard, driven flush to the soil surface. In extreme cases, we use biodegradable jute netting under the sod to provide an extra layer of mechanical grip. This isn’t optional. It is the difference between a lawn and a landslide.
| Stabilization Method | Max Slope Gradient | Durability | Material Cost |
|---|---|---|---|
| Standard Staples | 2:1 (Moderate) | High | Low |
| Biodegradable Netting | 1.5:1 (Steep) | Very High | Moderate |
| Terraced Grading | 1:1 (Critical) | Permanent | High |
The Irrigation Challenge: Fighting the Runoff Curve
Irrigation on a slope is a technical nightmare for the uninitiated. If you run your zones for 20 minutes, 15 minutes of that water is just running down the hill and pooling at the bottom. This results in ‘scalping’ at the top where it’s bone dry and ‘drowning’ at the base. You must use the cycle-and-soak method. Set your controller to run for 5 minutes, four times a day, with an hour break in between. This allows the water to actually penetrate the root zone through capillary action rather than succumbing to gravity. We prefer high-efficiency rotary nozzles that apply water at a much slower rate (0.4 inches per hour) compared to standard spray heads. This matches the soil’s infiltration rate.
“Surface runoff on slopes increases exponentially with compaction; ensuring a porous soil structure is the primary defense against turf displacement.” – Agronomy Manual for Soil Conservation
Step-by-Step Hillside Sod Installation Protocol
- Clear and Grade: Remove all debris. Ensure the grade directs water away from the home’s foundation.
- Soil Amendment: Incorporate 1 inch of organic compost into the top 3 inches of soil.
- Tamping: Use a water-filled roller to firm the soil. The soil should be firm enough that your boot doesn’t sink more than 1/2 inch.
- Staggered Layout: Begin at the bottom of the hill. Lay the first row and work upward, staggering joints like bricks.
- Staple Pattern: Insert staples at every corner and in the center of each piece.
- Cleated Rolling: Use a specialized roller to press the sod into the soil, ensuring zero air gaps.
How often should you water sod on a slope?
Newly installed sod on a slope requires saturation within 15 minutes of being laid. For the first 14 days, the goal is to keep the soil beneath the sod consistently moist but not soupy. On a hill, this usually means three to five short irrigation cycles per day. After two weeks, perform a ‘tug test.’ If the sod resists being lifted, the roots have successfully anchored. At this point, you can gradually reduce frequency but increase the duration of each cycle to force those roots to dive deeper into the subsoil. Deep roots are the only thing that will keep that hill stable five years from now. Don’t skip the phosphorus-heavy starter fertilizer. It’s the fuel for root development. Avoid high-nitrogen blends initially; you don’t want top growth yet, you want structural anchors. [IMAGE_PLACEHOLDER] “, “image”: {“imagePrompt”: “A high-resolution cross-section diagram of sod being installed on a 30-degree dirt slope. Show the staggered brick-like pattern of the sod rolls, 6-inch metal staples being driven through the sod into the soil, and a layer of compost-amended soil beneath the turf. Include arrows indicating the direction of water flow being slowed by the staggered seams.”, “imageTitle”: “Technical Diagram of Hillside Sod Installation”, “imageAlt”: “Diagram showing sod staples and staggered layout for steep hill landscaping”}, “categoryId”: 0, “postTime”: “”}