
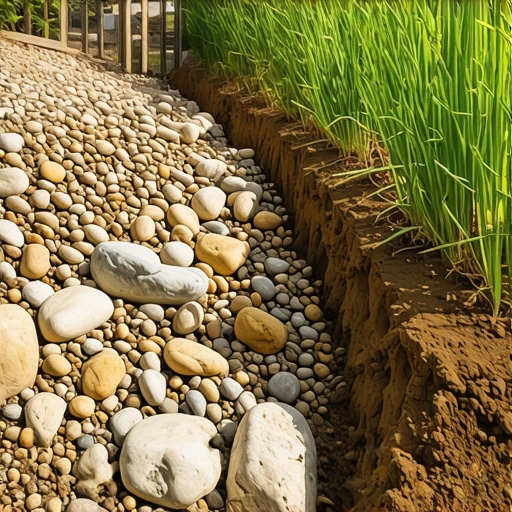
The Hardscape Autopsy: Why Most Drainage Projects Fail
I recently got called out to tear up a $30,000 patio that was sinking because the previous contractor failed to respect the physics of water. The homeowner watched in horror as their expensive pavers turned into a literal pond during a summer storm. The culprit was not the stone or the labor; it was a total lack of hydrostatic pressure management. Water is the most destructive force in any yard. If you do not give it a designated, engineered path to travel, it will create its own path through your foundation, your retaining walls, and your high-end sod install. This is why we build dry creek beds. A dry creek bed is not a decoration. It is a civil engineering solution disguised as a landscape feature.
Why a Dry Creek Bed is the Superior Drainage Solution
A dry creek bed stops yard erosion by slowing down the velocity of runoff and directing it into a managed channel lined with geotextile fabric and heavy stone. Unlike a buried pipe that can clog with sediment, a surface creek bed is easy to maintain and handles massive surges of water without failing. It mimics natural hydrology to prevent topsoil loss. It works. Do not let anyone tell you a plastic pipe is better for heavy slope runoff.
“A retaining wall doesn’t fail because of the stone; it fails because of the water trapped behind it.” – Hardscape Engineering Axiom
How much modified gravel do I need for a patio base?
While this article focuses on creek beds, the base principle is the same: you need roughly 6 inches of compacted 2A modified gravel for most residential hardscapes to ensure proper drainage and load-bearing capacity. For a dry creek bed, the focus shifts to non-woven geotextile fabric and varied stone sizing to break water surface tension.
Material Selection: Why River Rock Trumps Mulch
Selecting the right aggregate is the difference between a permanent solution and a mess that washes away in the first storm. You cannot use lightweight pea gravel for the main channel. It will migrate. You need D50-sized rip-rap or heavy river rock ranging from 3 to 12 inches in diameter. The weight of the stone provides the friction needed to slow water down.
| Material Type | Function | Resistance to Washout |
|---|---|---|
| River Rock (3-6 inch) | Main Channel Lining | High |
| Boulders (12+ inch) | Structural Anchoring | Extreme |
| Non-Woven Geotextile | Soil Separation | Essential |
| Pea Gravel | Decorative Infill Only | Low |
The Engineering Phase: Siting and Grading
You must start with a site survey. Look for the natural low points where water gathers after a heavy rain. This is your flow line. Before you dig, call 811. Utility lines often run right through the areas where water naturally drains. Once cleared, you must excavate a trench that is at least twice as wide as it is deep. A shallow, wide channel is much more effective at dissipating energy than a deep, narrow one. The sides must be sloped at a 3:1 ratio to prevent the banks from collapsing. Do not skip the grading. If the pitch is less than 1 percent, the water will just sit and breed mosquitoes. You need a consistent fall from the source to the exit point.
Can I build a dry creek bed over an existing utility line?
Yes, but you must manually excavate the area to avoid damage. Ensure there is at least 12 inches of soil cover over the utility before laying your geotextile fabric and stone to prevent point-loading pressure on the pipes. Digging is the hard part. Do it carefully.
The Installation Process: The Forensic Approach
First, excavate the channel to a depth of 12 to 18 inches. Remove all organic debris. Roots will rot and create voids. After excavation, lay down a heavy-duty 4oz or 6oz non-woven geotextile fabric. Do not use the woven plastic junk from big-box stores; it does not allow for lateral water movement and it is too slick. Pin the fabric every 2 feet. Next, place your largest boulders at the bends of the creek. This is where the centrifugal force of the water is highest. These boulders act as energy dissipaters. Fill the rest of the channel with your 3 to 6 inch river rock.
- Never use plastic liners; they trap water and rot the soil biology.
- Always overlap fabric seams by at least 12 inches.
- Ensure the exit point of the creek bed does not flood your neighbor’s property.
- Use a plate compactor on the sub-grade before laying fabric.
Plant Integration: Bio-Engineering the Banks
A dry creek bed looks like a scar on the land until you plant it. But this is not about aesthetics; it is about root-binding. You need plants that can handle both wet feet and drought. Native grasses like Panicum virgatum (Switchgrass) have deep root systems that hold the soil in place. Avoid “mulch volcanoes” near the creek edge. Mulch will float away and clog your rock channel. Use groundcovers and perennials that can weave between the rocks.
“Soil stability is a function of both mechanical armoring and biological reinforcement.” – USDA Soil Conservation Service Standards
Maintenance and Long-Term Performance
The biggest enemy of a dry creek bed is sediment and leaf litter. If you let a “mow-and-blow” crew blast grass clippings into your rocks, they will decompose and turn into soil. That soil will then grow weeds. Once a year, you must use a high-powered blower to clear out organic debris. Check the sediment load after every major storm. If you see silt building up, you may need to add a small sediment trap or a grassy swale further up the line. A properly built creek bed should last 25 years. It is a permanent investment in your property’s infrastructure.