
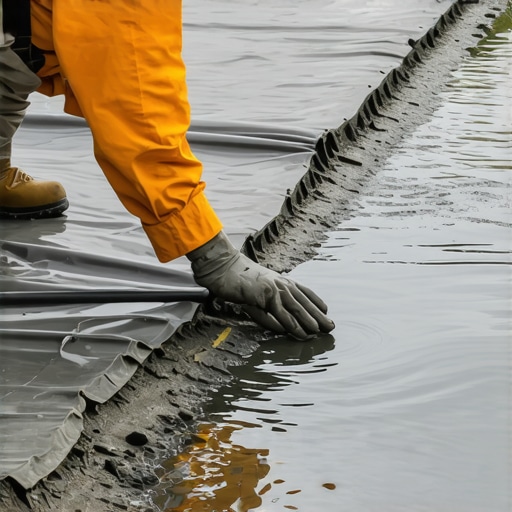
The Forensic Autopsy of a Failing Pond System
The first sign of a pond liner failure is rarely a catastrophic flood. Instead, it is the rhythmic, maddening retreat of the waterline by two inches every forty-eight hours. You see the exposed, slimy rock shelf. You see the stress on the riparian plantings. You see the bio-filter struggling as the pump begins to suck air. When a pond loses water, it is not just a leak; it is a systemic failure of the primary containment vessel. Most homeowners waste weeks on irrigation adjustments or blaming evaporation. Physics does not lie. If the water drops to a specific point and stops, the leak is at that elevation. If it drops to the bottom, the floor is breached. Repairing a pond liner in the 2026 season requires more than just a piece of rubber and some glue. It requires an understanding of polymer degradation and the hydrostatic pressure exerted by the surrounding soil. We are dealing with 45-mil EPDM that has likely been in the ground for two decades. It is brittle, oxidized, and covered in a biofilm that rejects standard adhesives. You cannot just slap a sticker on it and expect it to hold against fifty tons of water pressure.
The Hardscape Autopsy: Why This System Failed
I recently got called out to tear up a $30,000 patio that was sinking because the previous contractor failed to manage the pond overflow correctly. The liner had developed a pinhole leak behind a stacked-stone waterfall. Because there was no drainage layer or French drain behind the liner, the leaking water saturated the modified gravel base of the adjacent patio. This turned the structural subgrade into a slurry of mud. As the water moved, it carried fines away from the aggregate, creating voids. The patio did not just settle; it rotated. The homeowner thought they had a ‘settling’ problem. They actually had a pond engineering problem. I had to excavate three tons of wet soil just to find a two-millimeter tear caused by a sharp piece of shale that should have been removed during the yard cleanup and initial grading phase. This is why we use underlayment. This is why we check for soil grading before a single drop of water enters the feature.
The Physics of EPDM Failures
EPDM (Ethylene Propylene Diene Monomer) is the gold standard for pond liners because of its elongation properties, often stretching up to 300 percent before failure. However, even this industrial-grade synthetic rubber is subject to environmental stressors. Over a twenty-year lifecycle, UV radiation at the waterline breaks down the carbon black stabilizers. This leads to micro-fissuring. When you add the mechanical stress of shifting rocks or the freezing and thawing of ground moisture, those fissures become punctures.
“A retaining wall doesn’t fail because of the stone; it fails because of the water trapped behind it.” – Hardscape Engineering Axiom
This same principle applies to pond liners. If the ground behind the liner is not compacted and drained, the water pressure inside the pond pushes the liner into every tiny void in the soil. Eventually, the EPDM reaches its tensile limit and snaps over a sharp pebble. This is not a ‘bad liner’ issue; it is a subgrade compaction issue.
How do I find a leak in my pond liner?
To find a leak in a pond liner, you must perform a drawdown test by turning off the pump and marking the water level with a wax pencil. If the water stops dropping at a certain level, the leak is located exactly at that horizontal plane along the perimeter of the pond. Check behind waterfalls and around skimmer faceplates first, as these are the most common mechanical failure points. If the water continues to drop to the very bottom, the floor of the liner is likely punctured, often due to hydrostatic pressure from a high water table pushing upwards and stretching the rubber over sharp subgrade debris.
The Materials Science of Repair
When we talk about the EPDM patch method, we are not talking about DIY kits from a big-box store. We are talking about chemical vulcanization. To achieve a bond that will last another twenty years, you must use a heptane-based primer and a double-sided EPDM seam tape or a laminated cover strip. The goal is to fuse the patch to the existing liner at the molecular level. If the old liner is not prepared correctly, the patch will delaminate within six months. This is non-negotiable. Look at the data below to see why material choice matters for long-term pond integrity.
| Material Type | UV Resistance | Elongation Limit | Repair Method | Lifespan |
|---|---|---|---|---|
| EPDM (45-mil) | High | 300% | Chemical Primer/Tape | 25+ Years |
| PVC (20-mil) | Low | 150% | Heat Welding/Vinyl Glue | 7-10 Years |
| High-Density Polyethylene | Moderate | Low | Extrusion Welding | 20+ Years |
| Butyl Rubber | High | 250% | Adhesive Tape | 20 Years |
As the table demonstrates, EPDM offers the best balance of flexibility and longevity. When you are performing a sod install or a full landscaping overhaul near a water feature, ensuring the liner is intact is the first step. You do not want to lay 5,000 square feet of premium turf only to have to drive a skid-steer over it two months later to fix a leaking pond.
The EPDM Patch Protocol: Step-by-Step
Repairing a 2026-era liner requires a disciplined approach. You cannot skip the cleaning phase. Most failures occur because the technician tried to glue a patch onto pond muck. It will fail. Every time. Follow this checklist to ensure the repair holds under the weight of the water column.
- Drain the water to at least six inches below the suspected puncture site.
- Scrub the repair area with a stiff nylon brush and clean water to remove algae and biofilm.
- Use a specialized EPDM cleaner or unleaded gasoline (in a pinch) to strip the remaining oxidation until the rubber is matte black.
- Apply a thin, even coat of EPDM Splice Primer to both the liner and the patch.
- Wait for the ‘tack’ test. The primer should be sticky but not transfer to your finger.
- Apply the EPDM cover strip, starting from the center and working outward to avoid air pockets.
- Use a Steel Penny Roller to apply heavy pressure across the entire patch, especially at the edges.
This mechanical pressure is what initiates the chemical bond. If you do not roll the patch, you do not have a seal. You just have a piece of rubber resting on another piece of rubber. The bond must be airtight to prevent water from migrating under the patch and lifting it via capillary action.
How much modified gravel do I need for a pond base?
For a stable pond subgrade, you typically need a 2-inch to 4-inch layer of compacted modified gravel or sand, depending on the native soil stability. Use the formula: (Length x Width x Depth in feet) / 27 to determine the cubic yardage required. In areas with heavy clay, a thicker base of #57 stone may be necessary to facilitate drainage and prevent the liner from ‘floating’ when the groundwater table rises during spring rains. Proper base preparation prevents the liner from stretching over sharp rocks, which is the leading cause of EPDM failure.
The Biological Reality of 2026 Ponds
We are seeing more liners failing due to root intrusion from invasive species. When we do a yard cleanup, we often find that homeowners have planted aggressive willow or bamboo near the water’s edge. These roots don’t just grow toward water; they find micro-fissures in the EPDM and expand, tearing the liner from the outside in.
“A pond is a living organism; the liner is its skin. If the skin is breached, the organism’s homeostatic balance is destroyed.” – Horticultural Engineering Manual
If you are planning a sod install or new garden beds around your pond, keep large woody plants at least ten feet away from the liner edge. Use root barriers if necessary. The integrity of your pond depends on the stability of the soil surrounding it. If the soil is allowed to shift or if roots are allowed to probe, the liner is the first thing to go. You must also consider the irrigation lines. A leaking irrigation pipe near a pond can wash out the supporting soil, causing the liner to sag and eventually tear under the weight of the pond water. It is all connected. The grade, the drainage, the plants, and the liner. Do not treat them as separate systems. If you do, you will be calling me to fix a sinking patio again in five years. Don’t skip the details. Use the roller. Prime the rubber. Check the grade. Your pond depends on it.
{“@context”:”https://schema.org”,”@type”:”HowTo”,”name”:”Repairing an EPDM Pond Liner”,”step”:[{“@type”:”HowToStep”,”text”:”Drain water 6 inches below the leak and scrub the area clean of algae.”},{“@type”:”HowToStep”,”text”:”Clean the rubber with EPDM primer until all oxidation and biofilm are removed.”},{“@type”:”HowToStep”,”text”:”Apply EPDM Splice Primer to both the patch and the liner, waiting for it to become tacky.”},{“@type”:”HowToStep”,”text”:”Apply the EPDM patch and use a steel penny roller to seal the edges firmly.”}],”totalTime”:”PT1H”}