
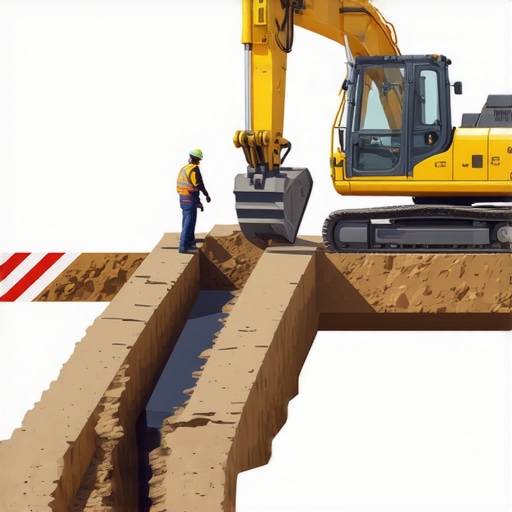
I recently got called out to tear up a $30,000 retaining wall and patio that was sinking and leaning because the previous contractor thought he could cheat the laws of physics. The wall was a massive 6-foot structural monster, and the guy used native clay soil for backfill instead of clean #57 stone. After two seasons of heavy rain, that clay turned into a heavy, hydraulic slurry. The pressure snapped the geogrid, and the wall started its slow, inevitable march toward the neighbors yard. This is a hardscape autopsy I see too often. Most contractors are just ‘mow-and-blow’ hacks who graduated to masonry without understanding the first thing about soil mechanics or hydrostatic pressure. They see a wall; I see a dam that is failing to hold back a thousand tons of saturated earth. In 2026, with our increasingly volatile weather patterns and flash-flood cycles, the old ways of building walls won’t cut it. You either manage the water, or the water manages your bank account.
The Critical Role of Hydrostatic Pressure in Wall Stability
Retaining wall failure is almost always caused by hydrostatic pressure, which is the massive force exerted by trapped water behind the wall structure. When soil becomes saturated, it loses internal friction and gains tremendous weight, pushing against the back of the blocks with lateral earth pressure that can easily exceed 60 pounds per square foot per foot of depth.
Water is the enemy. It is heavy, it is persistent, and it is incompressible. When you look at a leaning wall, you aren’t looking at a stone problem; you are looking at a drainage problem. The soil behind that wall has an ‘angle of repose’—the steepest angle at which it stays stable. Once water enters the mix, that angle flattens. The soil starts to slide, pushing the wall with it. This is why yard cleanup and maintaining clear drainage paths are not just about aesthetics; they are about structural integrity. If you have an irrigation system leaking near the wall, or if your sod install didn’t include proper grading, you are effectively pumping water into a hydraulic jack behind your masonry. It will fail. Every time.
“A retaining wall doesn’t fail because of the stone; it fails because of the water trapped behind it.” – Hardscape Engineering Axiom
Why is my retaining wall leaning forward?
Your wall is leaning because the retained earth has exceeded the structural capacity of the wall, usually due to poor sub-surface drainage and the accumulation of hydrostatic pressure. This often happens when the drainage stone is clogged with sediment or was never installed, forcing the wall to act as a dam rather than a porous barrier.
The Forensic Diagnosis: Why Walls Sink and Heave
Soil compaction and base-layer integrity are the two primary factors that determine if a wall stays level or begins to sink into the abyss. If your contractor didn’t use a vibratory plate compactor on every 6-inch lift of modified gravel, the wall is built on a sponge. In 2026, we are seeing more ‘settling’ than ever because of erratic freeze-thaw cycles that heave poorly constructed bases. You need at least 6 to 12 inches of compacted 2A modified stone (DGA) as a footing. Anything less is professional negligence. When we talk about fixing these issues, we have to look at the ‘toe’ of the wall. If the toe is buried correctly, the wall has a chance. If the base is shallow, the weight of the water-logged soil behind it will simply push the bottom of the wall out—a process we call ‘kick-out.’ [IMAGE_PLACEHOLDER] The fix for an existing wall that is still structurally sound but holding water is the installation of drill-hole drains, or weep holes. This is a surgical strike. We use diamond core bits to create a path for that trapped water to escape before it pushes the wall over.
How much modified gravel do I need for a patio base?
For a standard paver patio or retaining wall base, you need a minimum of 6 inches of compacted aggregate for pedestrian loads and 10 to 12 inches for walls or driveways. You must calculate the volume in cubic yards by multiplying the square footage by the depth in feet and dividing by 27, then adding a 20% compaction factor.
| Material Property | Drainage Efficiency | Structural Support | Cost Factor |
|---|---|---|---|
| #57 Clean Stone | Very High | Moderate | Medium |
| 2A Modified (DGA) | Low | Very High | Low |
| Native Clay | Zero | Low (When Wet) | Free |
| Drill-Hole Drains | High (Retrofit) | Neutral | Moderate |
The 2026 Remediation Protocol: Drill-Hole Drains
Drill-hole drains, or weep holes, are essential retrofit components that provide a direct exit path for subsurface water, effectively neutralizing hydrostatic pressure before it causes a wall to bulge or collapse. These drains are installed by core-drilling through the wall face and into the drainage stone layer, allowing gravity to pull water out and away from the structure.
To do this right, you don’t just grab a hammer drill and a masonry bit. You need a 2-inch or 3-inch diamond core bit and a constant water source to keep the bit cool and the dust down. You drill through the center of the block at the lowest possible point above the finished grade. Once you break through to the backfill, you often see a literal fire hose of water come out. That is the pressure that was trying to kill your wall. After drilling, we insert a perforated PVC pipe wrapped in a geotextile ‘sock’ to prevent fines and silt from clogging the new drain. This is the difference between a hack fix and an engineering solution. If you skip the filter fabric, the drain will clog in six months. It is wasted effort.
“Effective drainage systems must provide a path of least resistance for subsurface water to exit the structural backfill zone.” – National Concrete Masonry Association (NCMA)
- Mark drill locations every 4 to 6 feet along the wall base.
- Ensure the drill angle has a slight 2-degree downward pitch for drainage.
- Use diamond core bits to avoid fracturing the wall units.
- Flush the backfill area with water to clear sediment from the new port.
- Install a decorative grate or ‘weep cover’ to keep rodents out of the pipe.
Maintaining the Ecosystem: Irrigation and Cleanup
A retaining wall is part of a larger yard ecosystem. If your irrigation system is set to spray directly against the wall, you are accelerating the efflorescence process—that white crusty salt you see on stones—and over-saturating the backfill. Modern sod install techniques should always include a 2-foot ‘no-water zone’ behind a wall where you use decorative stone or mulch instead of thirsty turf. This keeps the water load manageable. Yard cleanup is also vital. Every autumn, organic debris, leaves, and silt wash down toward the wall. If this material clogs the surface of your drainage stone, the water can’t get down to your new drill-hole drains. It stays on top, freezes, and pushes the top blocks off the wall. Clean your swales. Clear your drains. Don’t let your landscape turn into a swamp. A wall is a machine; if you don’t maintain it, it breaks. Check the grade. If the ground is sloping toward the wall, you need a French drain or a swale to divert that surface water before it ever hits the backfill. In 2026, we don’t just build walls; we build water management systems that happen to look like walls.