
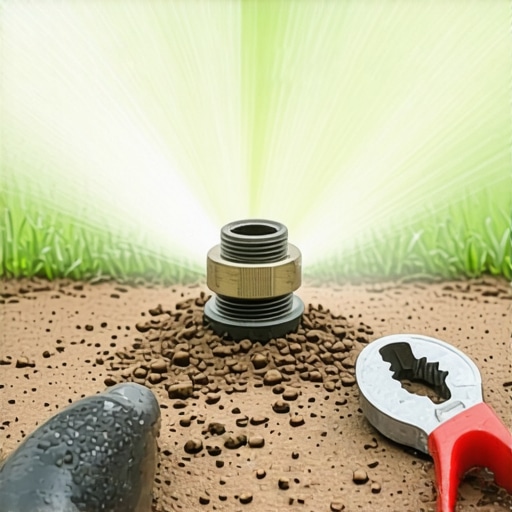
The Forensic Autopsy of a Failed Irrigation Head
To quickly clear a clogged sprinkler head, you must remove the nozzle and internal filter and perform a low-pressure manual flush of the riser. Increasing system pressure to blow out debris often causes lateral line ruptures or permanent damage to the internal gear drive of the rotor. Stop cranking the valve and start with disassembly.
I recently got called out to a property in a high-end development where the homeowner had just spent five figures on a professional sod install. Two weeks later, three heads in the back zone were barely weeping. Instead of calling me, he decided to ‘blast’ the clogs out by hooking up his shop compressor to the blowout port and cranking it to 120 PSI. He didn’t just clear the clogs; he shattered the seals on six other heads and turned a $50 service call into a $2,400 excavation job. This is the reality of irrigation: it is a delicate balance of hydrostatic pressure and mechanical tolerances. If you don’t respect the PSI limits of your PVC and polyethylene lines, you are just waiting for a catastrophic failure. I see this constantly with landscaping hacks who throw dirt around without protecting the irrigation infrastructure. One grain of sand in a spray nozzle is a nuisance; a line full of silt from a sloppy yard cleanup is a death sentence for your turf.
“The most common cause of irrigation system failure is not mechanical wear, but the introduction of abrasive particulates into the valve and nozzle assemblies.” – Irrigation Association Technical Manual
The Physics of the Clog: Why Your Heads Are Failing
Most clogs aren’t just ‘dirt.’ They are a combination of mineral scale, algae biofilm, and particulate matter like sand or silt. When you see a head that isn’t popping up or is spraying an irregular pattern, you are looking at a disruption in the laminar flow of the water. Inside that head, a small plastic filter is designed to catch anything larger than 1/32 of an inch. When that filter fills up, the pressure builds behind it but the flow rate (GPM) drops to near zero. If you try to force it, you risk blowing the wiper seal. This seal is the only thing keeping the water from leaking out of the riser. Once it’s gone, the head will never retract properly again. It will stay up. A mower will hit it. Then you’re back to digging. It’s a cycle of neglect I’ve seen for two decades. Fix the soil grading, manage your yard cleanup, and keep the debris away from the heads.
| Nozzle Type | Typical PSI | Clog Sensitivity | Primary Debris Cause |
|---|---|---|---|
| Fixed Spray | 30 PSI | High | Silt and Fine Sand |
| Rotary (MPR) | 40-45 PSI | Extreme | Calcium Build-up |
| Impact Rotor | 50-60 PSI | Low | Grass Clippings / Mulch |
How do I know if my sprinkler head is clogged?
Identify a clog by looking for ‘weeping’ heads that don’t fully extend or ‘dry spots’ in your sod install despite the system running. If the head pops up but the spray pattern is skewed or has ‘fingers’ of water rather than a fan, the orifice is obstructed. You can usually hear a high-pitched hiss as water tries to squeeze past the debris. Don’t ignore it. That back-pressure is stressing your solenoid valves. Every minute that head struggles, you are wearing down the diaphragm inside the valve box. It’s an engineering chain reaction.
The Professional Flush: A Step-by-Step Remediation
- Step 1: Isolate the Head. Turn off the zone and use a shovel to carefully remove the sod around the head. Do not nick the pipe.
- Step 2: Remove the Internal Assembly. Unscrew the cap and pull the entire riser and spring out. Don’t let dirt fall into the open body.
- Step 3: The Filter Cleanse. Pull the small plastic filter from the bottom of the nozzle. Wash it in a bucket of clean water. If it’s coated in calcium, replace it. They cost pennies.
- Step 4: The Low-Pressure Flush. While the internals are out, have someone turn the zone on for exactly 5 seconds. This ‘blows out’ any sand sitting in the lateral line.
- Step 5: Reassemble and Inspect. Put the clean filter and nozzle back in. Check the spray arc. It should be crisp.
“Uniformity of water application is critical; a single clogged head can reduce the overall efficiency of an irrigation zone by as much as 40%.” – Penn State Extension: Turfgrass Management
Can I use an air compressor to clean sprinkler heads?
No. Never use an air compressor to clear an individual head clog. Air is compressible; water is not. When you introduce high-pressure air into a system designed for water, you create water hammer effects that can reach 400+ PSI in localized sections of the pipe. You will shatter your PVC fittings underground. The only time air belongs in your pipes is during a professional winterization blowout, where the pressure is strictly regulated to under 50 PSI for PVC or 80 PSI for Poly. For clearing a clog, manual cleaning is the only professional path. It is tedious. It is wet. It is the only way that works. Don’t be lazy.
Maintenance to Prevent Future Clogs
Prevention starts with a proper yard cleanup. When you mow, don’t blow clippings toward the heads. When you do a sod install, ensure the heads are set 1/2 inch above the soil grade to prevent the ‘sink’ effect where dirt washes into the wiper seals. Use swing pipe (funny pipe) to allow for some movement if the head is stepped on. This prevents the lateral line from cracking under the weight of a mower. Finally, check your irrigation controller monthly. If you see a zone running long, check the heads. It’s not a ‘set and forget’ system. It’s a machine. Treat it like one.
{“@context”:”https://schema.org”,”@type”:”HowTo”,”name”:”How to Clear a Clogged Sprinkler Head”,”description”:”A professional guide to clearing irrigation clogs without damaging the system.”,”step”:[{“@type”:”HowToStep”,”text”:”Turn off the water and clear the area around the sprinkler head.”},{“@type”:”HowToStep”,”text”:”Unscrew the top cap and remove the riser, nozzle, and filter.”},{“@type”:”HowToStep”,”text”:”Clean the filter in fresh water or replace if mineralized.”},{“@type”:”HowToStep”,”text”:”Briefly turn on the water to flush debris from the lateral lines.”},{“@type”:”HowToStep”,”text”:”Reassemble the head and test the spray pattern.”}]}