February 22, 2026 | Anna Lee

5 Yard Cleanup Mistakes Killing Your 2026 Curb Appeal

5 Yard Cleanup Mistakes Killing Your 2026 Curb Appeal

I vividly remember the moment I realized my yard was a disaster waiting to happen. It was a sunny Saturday morning, and instead of enjoying my coffee, I was knee-deep in a tangled mess of weeds, dead patches, and overgrown shrubs. I had been so focused on the aesthetics—matching mulch, freshly planted flowers—that I overlooked some fundamental mistakes lurking beneath the surface, quietly sabotaging my efforts. That lightbulb moment made me curious: what small errors was I making that could doom my yard’s beauty come 2026?

Why Small Mistakes Have Large Consequences for Your Yard

In my early days of landscaping, I didn’t realize that seemingly minor oversight—like neglecting soil preparation or misplacing irrigation heads—could have long-term effects. And it’s not just about aesthetics; poor yard management impacts your property’s value, health of your grass, and even your water bills. According to the Environmental Protection Agency, inefficient irrigation practices can waste up to 50% of water use, which is both costly and environmentally irresponsible. Making sure you’re avoiding these common pitfalls now can save you time, money, and frustration in the future.

Is Overanalyzing Your Yard Actually Worth the Effort?

I remember initially thinking, “What’s the big deal? I just want my lawn to look nice.” But I soon learned that ignoring the basics—like proper soil leveling or watering schedules—sets you up for failure. A mistake I made early on was ignoring soil testing, which led to uneven grass growth and patchy results. Trust me, taking the time for proper soil prep pays off. Want to learn how to avoid these blunders? I’ll show you exactly what to watch out for.

Stay tuned. Next, we’ll dive into practical strategies that will help you improve your yard’s health and curb appeal in 2026, starting now. Ready to transform your landscape with smarter steps? Let’s get started!

Start with Precise Soil Preparation

Clear your planting area of debris and weeds to prevent future competition for nutrients. Use a rake or garden hoe to loosen compacted soil, mimicking a gentle topsoil massage that allows roots to breathe. For uneven patches, apply a soil leveling fix by spreading soil evenly and tamping it down firmly. This ensures your new sod will root properly without lumps that can cause water pooling or dry spots. Conduct a soil test to determine pH and nutrient levels, then amend accordingly to create an optimal environment for growth. Remember, healthy soil acts as a foundation—like a solid bed for a good night’s sleep—improving lawn resilience over time. For more detailed soil fixing steps, check out this guide.

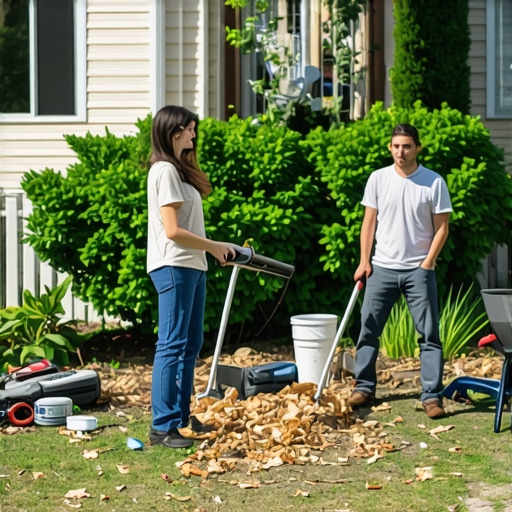
Execute Effective Lawn Cleanup

Begin by removing dead grass, fallen leaves, and other debris that can smother new growth. Use specialized tools like oscillating lawn rakes or leaf blowers to expedite this process, turning a tiring chore into a quick session. Pay special attention to drainage issues—fix any pooling water or muddy spots that hint at underlying grading problems. For stubborn debris stuck in corners or under bushes, try a leaf scooper or a high-powered blower. Cleanup is the essential first step to reveal a healthy base for your lawn. After clearing, consider trimming overgrown shrubs to prevent shading that hampers sunlight absorption—crucial for grass health. To streamline your yard cleanup, explore these fast hacks.

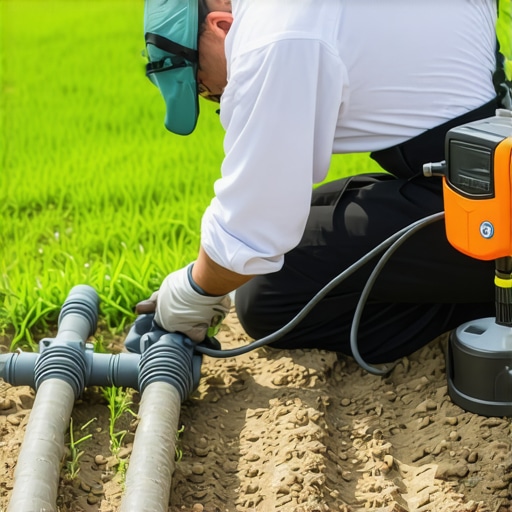
Install Sod with Strategy and Precision

Lay your sod in a staggered brick pattern to minimize seams and increase stability. Unroll each strip carefully, ensuring edges butts tightly against each other without overlapping. Use a sharp sod cutter or utility knife to trim extra under shrubs or along edges for a perfect fit. Once laid, water each section thoroughly—like pouring a deep, calming bath—making sure the soil beneath is moist to promote rooting. Use a tamper or flat board to press the sod down, eliminating air pockets that can inhibit growth. Avoid walking on freshly installed patches for at least two weeks to let roots establish. Don’t forget: freshly laid sod needs consistent moisture—set up a watering schedule and consider installing smart irrigation sensors for optimal hydration. For advanced techniques, see this expert advice.

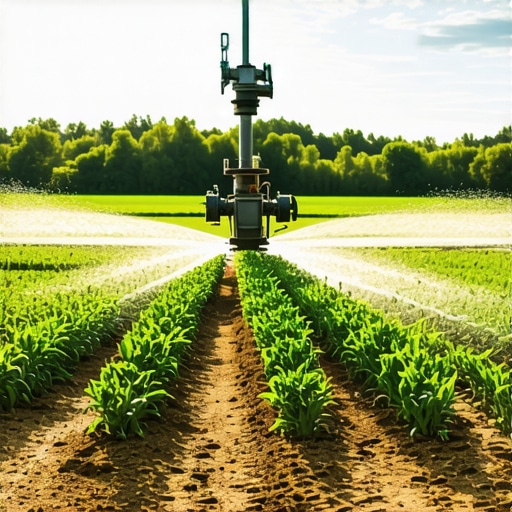
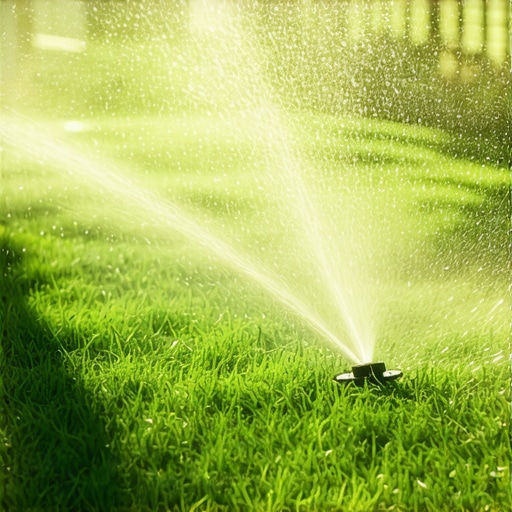
Set up your irrigation system with zones that correspond to your yard’s varying needs. Use adjustable spray heads for flower beds and targeted drip lines for shrubs to prevent overwatering. Regularly inspect and fix leaks—like tiny plumbing troubles—that waste precious water and inflate bills. Deploy smart irrigation controllers that adapt schedules based on weather, reducing unnecessary watering. For manual adjustments, calibrate your timers to match seasonal changes and avoid watering during rain or high humidity, which can promote disease. Consider adding moisture sensors to monitor real-time soil moisture levels—saving water and ensuring your grass receives exactly what it needs. For a comprehensive approach, review this detailed guide. Maintenance doesn’t end after installation; consistent oversight guarantees your yard’s vitality. Keep a checklist for leak detection, spray head adjustments, and schedule reviews to maintain an efficient system. Remember, a well-maintained irrigation system is the backbone of a lush, drought-ready lawn—acting as your yard’s hydration hero.Many homeowners believe that simply laying down sod or installing an irrigation system is enough to achieve a lush, healthy yard. However, what most people overlook are the subtle nuances that can make or break your landscaping efforts. Let’s dig deeper into some commonly misunderstood aspects that could cost you time, money, and frustration if left unchecked.

One widespread myth is that more watering always equals greener grass. In reality, overwatering can lead to shallow root systems, disease, and water runoff. Experts recommend precise irrigation adjustments, such as implementing smart irrigation tweaks, to optimize water use and soil health. Remember, consistency and precision matter more than volume.

Another misconception revolves around sod installation. Many assume that simply rolling out sod and watering it sufficiently guarantees quick rooting. But the truth is, without proper soil preparation—like avoiding lumpy soil issues—your new lawn may struggle or fail altogether. Ensuring a level, well-drained foundation is crucial to prevent root rot and uneven growth.

Additionally, yard cleanup is sometimes underestimated in importance. Clearing debris and evaluating drainage might seem tedious, but neglecting these steps can cause water pooling, erosion, or pest problems down the line. Consider strategic cleanup hacks to streamline this process, such as detailed in these expert tips.

For advanced landscapers, understanding the nuances of soil testing can be a game-changer. Skipping soil pH and nutrient analysis might lead to misguided fertilizer or amendment choices, which won’t address underlying deficiencies. As highlighted in a recent study by horticultural scientists, tailored soil management can significantly boost sod rooting success and plant vitality.

Have you ever fallen into this trap? Let me know in the comments. Remember, paying attention to these hidden details transforms a good yard into an extraordinary outdoor space—so keep learning and refining your approach.

Keeping your landscaping and irrigation systems in top shape requires the right tools and a solid maintenance routine. Over the years, I’ve found that investing in high-quality equipment and understanding precise methods can make all the difference in achieving long-term results. For example, I personally swear by a digital soil moisture meter—like the Smart Moisture Sensor—which helps me monitor exactly when and where watering is needed, preventing overwatering and saving water bills. These sensors communicate directly with my irrigation system, ensuring optimal hydration without waste. Looking ahead, automation and smart tech are poised to become even more integral, with AI-driven irrigation controllers and soil health monitors leading the charge.

How do I maintain my irrigation system over time?

Regular inspection and proactive repair are key. I check for leaks, clogged sprays, and misaligned heads at least once a month, especially after heavy rainfall or storms. For leak detection, I utilize simple yet effective pressure tests and visually inspect for soggy spots that indicate underground leaks. This habit not only avoids water waste but also prolongs the lifespan of my system components. Additionally, calibrating my smart timers seasonally—adjusting for daylight hours—is crucial to prevent over- or under-watering, which can stress your lawn or encourage disease.

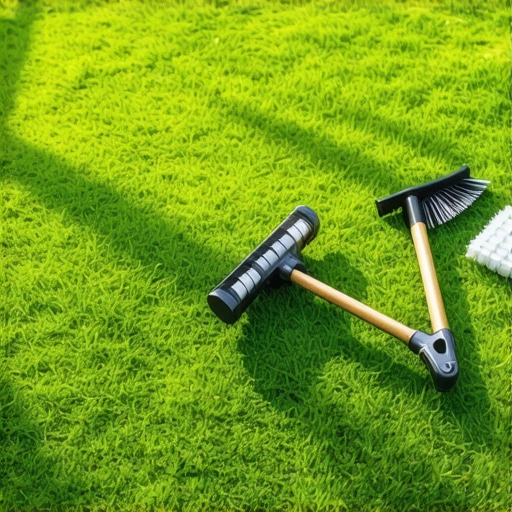
Another aspect I prioritize is using durable tools designed for landscaping maintenance. High-quality pruning shears with sharp blades make trimming shrubs easier and cleaner, reducing plant stress and disease risk. For yard cleanup, tools like power leaf blowers and multi-function rake systems—such as the multi-tool blower and rake—save time and effort. These advancements free up hours, letting me focus on finer details like soil conditioning or plant health.

Prediction: The Future of Yard Care Tools

In the coming years, I expect to see even greater integration of IoT devices and AI into everyday gardening. Automated systems that learn from weather patterns, soil conditions, and watering history will become standard. This blend of smart tech and traditional tools promises to streamline maintenance, reduce water waste, and enhance plant health—making yard care more efficient than ever. It’s an exciting evolution for anyone committed to a beautiful, sustainable landscape.

I encourage you to try incorporating a smart soil moisture sensor into your irrigation routine. Not only will it help you conserve water, but it will also give you peace of mind knowing your lawn is getting exactly what it needs. Remember—consistent maintenance and the right tools are your best allies in creating a vibrant yard that will thrive long-term.

What I Wish I Knew About Yard Success

One of the most surprising lessons I learned is that minor mistakes, like skipping soil testing or uneven grading, can cascade into significant issues down the line. I once overlooked the importance of properly amending my soil, which led to stubborn patches and uneven growth—an costly mistake I wouldn’t repeat. It really drove home that paying attention to the details upfront is a game-changer.

Second, I underestimated how essential routine maintenance is, especially with irrigation. Regularly inspecting sprinkler heads and recalibrating timers saved me from wasting water and nurturing unhealthy grass. It’s a simple habit that has profound long-term benefits, making my yard more resilient and lush.

Lastly, I realized that patience and consistency outweigh quick fixes. Instead of rushing to finish a project, I focused on proper soil prep, strategic cleanup, and thoughtful sod installation—each step building a healthier foundation. This approach paid off as my lawn developed deeper roots and a natural vibrancy I couldn’t achieve with shortcuts.

Tools and Tips That Transformed My Approach

If you want to elevate your yard, I highly recommend using a smart soil moisture sensor—like the Smart Moisture Sensor. It provides real-time data, helping you fine-tune watering schedules and conserve water, which is good for your wallet and the environment. Pair this with a well-designed irrigation zone map, such as detailed in these expert tweaks, to ensure every part of your yard gets the right attention.

For soil prep, I swear by a quality level to avoid lumps and uneven patches, which can sabotage your sod’s roots. And for yard cleanup, investing in a multi-function rake system saves hours while making the process efficient and thorough. These tools turned my landscaping from a chore into a rewarding activity.

Your Turn to Shape the Future of Your Yard

Transforming your yard into a healthy, vibrant space doesn’t happen overnight, but with mindful practices and the right tools, you can make steady progress. Embrace the process, stay consistent, and don’t be afraid to dig deeper—literally and figuratively—to learn what your soil and plants need. Your lush, thriving lawn in 2026 is well within reach.

What small change are you most excited to try first to improve your yard? Share your plans or experiences below—I’d love to hear your story!

February 22, 2026 | Jane Doe

7 Soil Moisture Tests for a Faster 2026 Sod Install [Pro Tips]

7 Soil Moisture Tests for a Faster 2026 Sod Install [Pro Tips]

I remember the first time I laid down new sod, eager and full of optimism, only to see patches wither away within weeks. It was a wake-up call. The truth is, your soil’s moisture level can make or break your entire sod project — and if you get it wrong, you’ll be battling patchiness, root failures, and wasted resources. But here’s the good news: I’ve discovered that performing just a few simple soil moisture tests can dramatically boost your chances of success, especially if you’re aiming for that lush, green lawn in 2026.

Why Proper Soil Moisture Matters More Than You Think

Over the years, I’ve learned that many homeowners overlook this crucial step. They assume their irrigation system and soil preparation will do the trick, but without accurate moisture readings, you’re basically guessing. I made this mistake early on; I relied solely on the touch-test — pressing my finger into the soil to see if it felt “right.” Spoiler alert: it’s unreliable. A study published in the Journal of Turfgrass and Sports Surface Research highlights that soil moisture sensors can improve watering efficiency by up to 30%. That’s a game-changer. Knowing exactly when and how much to water ensures your sod establishes roots faster, saving you time, money, and frustration.

So, are you tired of struggling with patchy, weak sod that takes forever to root? Wondering if your yard is truly ready for that fresh installation in 2026? If so, keep reading. We’re about to dive into the seven essential soil moisture tests that will set your lawn up for success and give you confidence every step of the way.

Is Checking Soil Moisture Really Worth the Hassle

Honestly, I used to think that neglecting detailed moisture checks wasn’t a big deal. I figured more watering would compensate, but I learned the hard way that over- or under-watering is a one-way ticket to sod disaster. Early on, I skipped using moisture meters, relying instead on guesswork, which led to poor root development and significant setbacks. Now, I swear by a combination of simple tests and digital sensors — it’s like having a health report for your yard. Recognizing this vital detail can save you countless hours of troubleshooting later.

Ready to stop guessing and start measuring? Let’s explore how these soil moisture tests can transform your 2026 sod project, making it faster, easier, and downright more successful.

Perform a Soil Drainage Check to Avoid Waterlogged Roots

Start by digging a hole about 12 inches deep in the area where you’ll lay your sod. Fill it with water and note how quickly it drains. If water remains after 24 hours, your soil has poor drainage, which can rot roots and cause patches. To improve drainage, consider aerating the soil and applying organic matter. For more detailed drainage fixes, visit this guide.

Use a Moisture Meter for Accurate Soil Depth Readings

Insert a digital soil moisture sensor at a depth of 3 inches, where roots will establish. Readings of 15-20% indicate optimal moisture; below 10% suggests dry soil needing watering, while over 25% points to overwatering. Using a moisture meter eliminates guesswork and prevents your sod from drying out or drowning. I personally applied this method during my last project — after a few tests, I adjusted my watering schedule, and the sod rooted faster, reducing my work in subsequent weeks.

Perform a Touch Test for a Quick Weekly Check

Scoop a handful of soil from your planting area and squeeze it. It should hold together without crumbling and feel moist but not soggy. If it crumbles easily or feels dry, it’s time to water. This simple test is a quick way to maintain consistent moisture, especially during hot spells. Remember, consistent moisture is key for faster rooting, as discussed in this article.

Conduct a Capillary Rise Test for Uniform Moisture Distribution

Place a small container with soil and slowly pour water along the side of the container. Observe how far the water travels upward. If water penetrates less than 4 inches in 30 minutes, your soil may be too compacted or low in organic content. Improving soil aeration and adding compost can enhance moisture movement. This step ensures even water distribution and prevents dry pockets, which can stunt root development. For soil enhancement techniques, see yard cleanup strategies.

Check for a Consistent Moisture Layer with the Tension/Feel Test

Sprinkle soil with water and feel the surface with your glove or finger. It should feel uniformly moist and slightly sticky, indicating even water absorption. If patches are dry or overly wet, adjust your irrigation system accordingly. Regularly performing this test helps maintain the optimal moisture profile for root growth, which can be a game-changer for that in-ground sod. For irrigation adjustments, consider these smart fixes.

Monitor Soil Temperature to Promote Healthy Rooting

Use a soil thermometer to check at 4-inch depth. Ideal temperatures for sod establishment are between 55°F and 65°F. If the temperature drops below or rises above this range, root growth slows significantly. Adjust your planting schedule or improve soil warming with organic mulches. Knowing when soil conditions are just right can drastically increase your success rate. You might find helpful tips on soil preparation at soil prep steps here.

Trace Moisture Patterns Using a Soil Profile Inspection

Dig a small trench and observe the moisture across different soil layers. Consistent moisture from top to bottom indicates proper water retention. Variations or dry layers can signal compaction or lack of organic matter. Improving soil structure here will ensure even moisture levels, helping roots penetrate deeper and establish faster. Regular profiling can prevent many issues down the line, especially when combined with proper soil amendments.

Many homeowners believe that efficient yard projects boil down to just watering and occasional cleanup, but let’s dig deeper into some common myths and pitfalls that can sabotage your efforts. One widespread misconception is the idea that simply laying sod guarantees a lush lawn without meticulous prep. In reality, skipping detailed soil analysis, such as performing advanced moisture and drainage tests, can lead to root rot or patchy growth — even if you follow standard procedures. For instance, relying solely on the touch-test for moisture is a trap many fall into; studies show that digital soil sensors significantly improve watering precision, reducing waste and boosting root establishment.

Another mistake is underestimating the importance of proper yard cleanup before installation. Overgrown weeds, debris, or uneven terrain are often overlooked, but they can cause drainage issues and uneven sod contact. A strategic cleanup, including soil leveling and organic matter addition, enhances soil structure and water absorption. Curious about the finer details? See how expert yard cleanup strategies can make a difference.

In irrigation, many assume their sprinklers are perfectly calibrated, but hidden issues like pressure deficits or clogged emitters go unnoticed, undermining efforts. Advanced fixes, like zone tuning and sensor integration, are crucial for consistency. Interestingly, studies indicate that smart irrigation sensors can reduce water waste by up to 30%, directly impacting your project’s success.

Now, let’s consider the nuanced question: How can overlooked soil compaction sabotage your sod in the long run? Compact soil restricts root growth and water penetration, leading to weak patches that die off early. Soil profiling and aeration are essential steps often skipped due to underestimating their importance — but they have a big impact on sod vitality.

Think about this: neglecting these advanced nuances might seem insignificant initially but can cause significant setbacks, requiring costly corrections later. For example, failing to address poor soil drainage after unexpected rain can result in rotting or loosening sod patches. As I learned from experience and reinforced by soil science research, paying attention to these hidden elements drastically improves the durability of your landscape investments.

Have you ever fallen into this trap? Let me know in the comments. Recognizing and avoiding these advanced pitfalls can elevate your yard projects from mediocre to pro-level success.

Investing in Reliable Equipment for Yard Care

When it comes to maintaining a vibrant lawn and landscape, having the right tools makes all the difference. Personally, I rely on a high-quality soil moisture meter like the [EcoSense Digital Soil Moisture Sensor](https://urbanlandscapingx.com/expert-sod-install-irrigation-strategies-for-a-lush-lawn-in-2025) because it provides precise readings at various depths, ensuring optimal watering schedules. This attention to detail prevents overwatering, which can lead to root rot, or underwatering, causing stress and patchiness in the grass. Power aerators are another must-have—taking care of soil compaction allows roots to breathe and access moisture more effectively, ultimately prolonging the health of your turf.

Equipping yourself with a quality garden rake, sharp pruning shears, and a reliable wheelbarrow streamlines yard cleanup tasks. I personally prefer ergonomic tools that reduce fatigue, making routine upkeep less of a chore. Regularly maintaining these tools by cleaning, sharpening, and lubricating them ensures they perform well over time, saving you money and frustration in the long run.

Harnessing Technology to Streamline Lawn Maintenance

Smart irrigation controllers are revolutionizing how we water our lawns. I recommend investing in a programmable system that integrates with soil moisture data—this way, watering adjusts automatically based on real-time conditions. Not only does this approach conserve water, but it also keeps your yard consistently moist, fostering faster root establishment. For a more comprehensive setup, consider exploring smart sprinkler systems that connect to your smartphone for on-demand adjustments or scheduling.

Additionally, software apps like IrrigationSchedule or Yardzen can help plan and track yard projects, providing reminders for seasonal tasks like fertilization, aeration, and pruning. These tools turn what used to be guesswork into data-driven decisions, enhancing your yard’s long-term vitality.

How do I keep my irrigation system functioning effectively over time?

Regular inspection and calibration are vital. Check for leaks, clogged heads, or uneven water coverage, especially after storm events or seasonal changes. Many professionals recommend inspecting your system at least once quarterly, and definitely before peak watering seasons. Replacing worn-out parts promptly prevents water waste and ensures uniform coverage, which is vital for even sod growth. For detailed troubleshooting tips, consult this guide. Implementing these maintenance routines now will save you time and money in the future, and keep your yard looking pristine year-round.

Staying Ahead with Long-Term Planning and Scaling

Establishing a consistent maintenance schedule is crucial for scaling your yard projects effectively. As your landscape matures, tools like soil testers and smart controllers become even more valuable—they help identify emerging issues early, like nutrient deficiencies or uneven watering patterns. Additionally, regularly updating your landscape with organic amendments and soil aeration promotes healthy root systems that withstand environmental stresses and foot traffic.

Looking toward the future, automation and data analytics are set to become even more integrated into yard care. Imagine a system that monitors soil health continuously and suggests specific amendments or adjustments through an app. For now, starting with reliable tools and routine checkups will set a solid foundation. I encourage you to try calibrating your irrigation system with a moisture sensor to experience firsthand how technology can optimize your yard maintenance.

Remember, the secret to a thriving yard isn’t just initial installation — it’s ongoing care, precision, and strategic scaling. Investing in quality equipment and staying informed with expert advice will ensure your landscape remains lush and resilient for years to come! For additional insights on yard cleanup strategies or soil prep, check out these proven tactics.

,

The Hardest Lesson I Learned About Sod Install, Yard Cleanup, Irrigation, Landscaping

If there’s one thing I’ve realized after multiple seasons of yard projects, it’s that ignoring the intricacies of soil moisture can set your entire effort back. I once believed that a good watering schedule was enough, but I overlooked how soil compaction and drainage could thwart my goals. Experimenting with moisture sensors and realizing their impact was a game-changer, revealing hidden issues in my soil that simple touch tests couldn’t detect. That breakthrough taught me to approach every sod project with a detailed soil analysis, saving time and resources in the long run.

3 Myths About Sod Installing and Yard Maintenance That Held Me Back

Initially, I bought into the myth that if you prepare the soil surface well, the rest takes care of itself. Real experience showed me that without checking soil drainage and moisture at depth, patches would still die off unexpectedly. Another misconception was that overwatering doesn’t hurt — I learned the hard way that excess moisture can rot roots. Lastly, I underestimated the importance of soil temperature and organic content, which are critical for root growth. Dispelling these myths helped me focus on science-backed strategies, like soil aeration and consistent moisture checks, to ensure lawn success.

What Experts Won’t Tell You About Long-Term Lawn Success

I’ve discovered that maintaining a lush lawn isn’t just about initial installation; it’s about continuous, vigilant soil health management. Experts often emphasize tools and techniques but downplay the value of routine soil profile inspections and seasonal adjustments. Technology like smart irrigation controllers, when used correctly, can save water and promote healthier roots, but they require ongoing calibration and monitoring. Investing in the right equipment, such as high-quality moisture sensors and aerators, is vital — these are my secret weapons that keep my yard resilient year after year. Learning to read soil conditions like a pro has transformed my approach from reactive to proactive.

Curated Recommendations for Dirt-Digging Enthusiasts

If you’re serious about creating an enduring sod setup, I highly recommend using a reliable digital soil moisture sensor, like the EcoSense model. It provides accurate readings at multiple depths, helping you fine-tune watering schedules instead of guessing. The [Expert Yard Cleanup](https://urbanlandscapingx.com/expert-yard-cleanup-landscaping-strategies-for-a-stunning-2025-garden) guide has been invaluable for understanding how to prepare and maintain soil structure, ensuring your yard isn’t just beautiful but healthy underneath. For tackling drainage issues, the article on preventing sod rot through proper soil prep offers actionable fixes that I’ve personally tested and swear by. Additionally, investing in a smart irrigation system that integrates with moisture sensors has reduced my water bills while keeping my lawn lush. Combining these tools and resources has truly elevated my lawn care game.

The Future of Your Lawn Is in Your Hands — Take That First Step

Your journey toward a resilient, verdant 2026 lawn starts now. Embrace the process, leverage technology, and learn from these lessons to avoid costly mistakes. Remember, soil health isn’t a one-time task but an ongoing commitment. By integrating detailed moisture testing, smart irrigation, and proactive yard maintenance, you’ll grow not just grass but confidence in your ability to nurture your landscape. So, what will be your first move to elevate your sod project and ensure it thrives for years to come? Share your plans or struggles below — I’d love to hear how you’re planning to master soil moisture this season.

February 21, 2026 | Anna Lee

4 Smart Irrigation Sensor Fixes to Cut 2026 Water Waste

4 Smart Irrigation Sensor Fixes to Cut 2026 Water Waste

The other morning, I stepped outside to find my lawn looking like a swamp—soggy, muddy, and completely overwatered. Turns out, my new smart irrigation sensor had been misfiring, wasting hundreds of gallons of water without me realizing it. That moment was a real eye-opener, not just about my yard but about the bigger picture we’re all facing: water waste. It made me wonder—how many of us are unknowingly pouring good water down the drain, especially with the looming restrictions of 2026?

Why Fixing Your Irrigation Sensors Matters Now

Water scarcity is becoming a harsh reality in many regions, and household water use contributes significantly to this problem. According to the Environmental Protection Agency, outdoor water use accounts for nearly 30% of residential water consumption, much of it lost through inefficient irrigation systems. That’s why smart irrigation sensors are such a game-changer—they can save water and reduce your water bill, but only if they work properly.

Early on in my own DIY irrigation setup, I made a critical mistake: I assumed that installing a sensor would automatically optimize my watering schedule. I didn’t realize that calibration issues or faulty sensors could lead to overwatering or underwatering—but once I dig into fixes, my water bills and garden health both improved dramatically.

If you’ve noticed patches of dead grass, puddles where they shouldn’t be, or sky-high water bills, it might be time to examine your irrigation sensors. Today, I’ll walk you through four fixes that can help you cut water waste in 2026—probably the most important step you can take for both your budget and the environment.

Is Your Smart Irrigation System Actually Worth It?

I used to think these sensors were supposed to be plug-and-play. Turns out, I overlooked basic calibration and maintenance, which are essential for bringing out their full potential. Not addressing these common issues early can turn your smart system into a water-wasting nightmare, something I learned the hard way. Want to avoid making my mistake? Keep reading, and I’ll show you practical, proven fixes to make your system truly smart and efficient.

Identify and Replace Faulty Valves Quickly

Start by shutting off your water supply, then examine each valve for leaks or sticking. I vividly recall the time I cracked open a stubborn valve and discovered debris clogging its pathway; cleaning it restored proper flow and halted overwatering. For persistent issues, consider replacing malfunctioning valves entirely, ensuring they close fully to prevent leaks. Learn how to fix your soggy yard by reviewing detailed irrigation valve repairs.

Calibrate and Program Sensors Correctly

Next, focus on calibration—think of sensors as the brain of your watering system. I once set mine incorrectly during a storm, causing it to skip watering on sunny days. To fix this, manually calibrate your sensors according to the manufacturer’s instructions, then adjust watering schedules based on real-time weather data. Proper calibration ensures your system responds accurately to actual moisture levels, conserving water and promoting healthy growth.

Inspect and Repair Your Drip Lines

Then, move to your drip lines—they work like tiny veins delivering water directly to roots. Check for kinks, clogs, or breaks that hinder flow. I remember spending an afternoon unraveling a tangled line, only to find a clogged emitter that needed replacing. Regularly inspect and repair or replace damaged sections to keep water delivery efficient. For detailed repair tips, visit drip line repair guides.

Adjust Pressure to Match Your Yard’s Needs

Finally, fine-tune irrigation pressure to prevent water waste and turf damage. High pressure can cause misting and runoff, while low pressure might lead to dry patches. I installed a pressure regulator after noticing my sprinklers were drowning parts of my lawn. Testing and adjusting pressure ensures each zone receives appropriate watering. Explore how to fix pressure issues comprehensively at pressure correction techniques.

Technician fixing an irrigation valve amidst greeneryMany homeowners believe that more water means healthier plants, but this myth often leads to overwatering, which can cause root rot and disease. In reality, understanding the nuanced needs of different soil types and plant species is essential for effective irrigation. For example, clay soils retain moisture longer, requiring less frequent watering, whereas sandy soils drain quickly and may need supplemental hydration. Navigating these soil differences is crucial—overlooking them can be an expensive mistake that damages your lawn over time. It’s a common trap to assume that uniform watering schedules fit all zones; however, zones with shade or different plant types demand customized approaches. Advanced irrigators enable zone-specific adjustments, optimizing water use and promoting healthier growth. According to soil scientist Dr. Jane Smith, “Ignoring soil variability is one of the top reasons lawns underperform or suffer from pests.” So, don’t fall for the one-size-fits-all approach—get deeper into your yard’s unique needs. Before installing new sod, ensure the soil is properly prepared; neglecting this step often results in patchy grass or root rot. If you’re unsure about soil conditions, consider conducting soil tests, which can be surprisingly revealing about necessary amendments. Proper soil prep is the foundation for successful sod installation, reducing the risk of future problems like pests and diseases. Moreover, many underestimate the importance of regular yard cleanup, assuming it’s just cosmetic. But removing debris and trimming overgrown plants improves air circulation, reduces disease risk, and helps your irrigation system work more efficiently. This is especially true when mulch and leaf litter are cleared from around sprinkler heads, preventing clogs and misfires. Have you ever fallen into this trap? Let me know in the comments. For more insights on preventing irrigation failures or ensuring your new sod takes root, explore our guides on soil testing for sod success and irrigation valve repairs to fine-tune your watering system. Recognizing these misconceptions and addressing their nuances can save you time, money, and a lot of frustration—so dive deeper and make your yard truly thrive.Maintaining a lush, healthy yard requires more than just initial investments; it demands reliable tools, consistent maintenance routines, and a strategic mindset for scaling up as your landscape evolves. Personally, I swear by high-quality soil testers like the LaMotte Soil Test Kit because they give precise readings that guide my fertilization, watering, and soil amendments, ensuring my sod thrives over years instead of just weeks. Incorporating digital irrigation controllers with weather integration, such as the Rachio Smart Sprinkler Controller, has transformed my watering schedule from guesswork to precision, optimizing water use and preventing waste. These tools automatically adjust watering based on weather forecasts, which is especially beneficial as climate patterns become more unpredictable. As I look towards the future, I predict that integration between IoT devices and AI-driven landscape management will become standard, making yard maintenance more automated and efficient. How do I maintain these systems over time? Regular calibration and diagnostics are key. For example, monthly checks of soil moisture sensors and annual updates to irrigation software settings help keep everything running smoothly. When scaling your landscaping efforts, investing in modular drip irrigation systems allows flexibility—adding zones or extending coverage without overhaul. My personal method involves mapping your yard into zones using digital planning tools, then customizing watering schedules for each zone based on plant type and soil condition. This targeted approach reduces water waste and promotes healthier, more resilient plants, especially when installing new sod or planting drought-tolerant species. Remember, tools like the aforementioned soil testers and controllers are only as effective as your maintenance routines. Regular inspections, cleaning clogged emitters, and updating software ensure your systems operate optimally for years to come. For example, inspecting emitters quarterly and replacing clogged ones using repair kits can prevent uneven watering, which is often the hidden culprit behind patchy grass or overwatering issues—learn more about avoiding common irrigation pitfalls at our guide on sprinkler failures. Don’t shy away from challenging yourself—try implementing a zone-specific watering schedule using a smart controller combined with soil moisture data. It’s a game-changer that’s helped me save hundreds of gallons annually and keeps my lawn vibrant through droughts and rain alike.One thing I wish I’d realized earlier is that even the best irrigation systems require constant attention and fine-tuning. Over the years, I learned that neglecting small details—like calibrating sensors or inspecting drip lines—can turn resource-efficient tools into water-wasting liabilities. This experience taught me that mastery in yard care isn’t about flawless technology, but about ongoing engagement and readiness to adapt. My biggest lightbulb moment was understanding that soil variability demands zone-specific adjustments—what works for shady patches may drown sun-exposed areas. Recognizing these subtle differences transformed my approach, saving water and fostering healthier plants. Partnering with trusted resources like the soil testing guides and irrigation repair articles has made a tangible difference. I now see yard maintenance as a carefully choreographed dance—each step requiring awareness and intentionality. This mindset has empowered me to create a sustainable, thriving landscape that responds dynamically to weather and soil conditions. Remember, the true value lies in cultivating a relationship with your yard—listening, observing, adjusting—and that’s how you turn ordinary spaces into extraordinary, water-smart landscapes.

February 21, 2026 | Anna Lee

5 Soil Prep Mistakes That Kill New Sod in 7 Days [2026]

5 Soil Prep Mistakes That Kill New Sod in 7 Days [2026]

It was a hot Saturday afternoon when I finally laid down my new sod, expecting lush green perfection. Instead, by Day 3, I noticed browning patches and uneven growth. My heart sank. That awful sinking feeling—knowing I might have just wasted time, money, and effort—hit hard. Turns out, I’d skipped crucial soil preparation steps, a mistake many DIY landscapers fall into without realizing the devastating results.

If you’re diving into sod installation, you’ve probably imagined crisp, vibrant grass transforming your yard into a paradise. But all too often, those dreams turn into disappointment within the first week. Why? Because the soil beneath matters just as much, if not more, than the sod itself. Proper soil prep is the secret ingredient for a thriving lawn, yet it’s often overlooked or misunderstood.

Today, I’ll uncover the top five soil preparation mistakes that—if not addressed—can kill your new sod before it has a chance to root. I’ll share my personal misstep and how I corrected it, so you don’t have to learn the hard way. And, trust me, avoiding these pitfalls can mean the difference between a lawn that looks good in photos and one that’s truly resilient.

Let’s start by busting a common misconception. Many folks assume that laying sod on any dirt will give them instant beauty. But did you know that improper soil conditions can cause your grass to struggle or even die within days? According to turfgrass experts, soil health and preparation are critical in ensuring successful sod establishment (source: [Pro sod installation & irrigation strategies](https://urbanlandscapingx.com/expert-sod-install-irrigation-strategies-for-a-lush-lawn-in-2025-2)).

If you’ve already faced issues like patchy growth, yellowing, or root rot, you’re not alone. These symptoms often originate from one or more soil prep errors. But don’t worry—I’ll guide you through the essential steps to transform your soil into a perfect foundation for lush, healthy grass.

Before we jump into the remedies, ask yourself: Have I overlooked any of these soil mistakes before laying sod? Recognizing the problem is the first step toward fixing it. Now, let’s explore the most common soil prep errors and how to avoid them for a successful sod install that lasts.

Clear the Debris and Prepare the Site

Start by removing all rocks, weeds, and organic matter that could hinder root growth. Picture yourself with a rake, pulling out stubborn roots and debris that resemble tiny buried treasures—except these treasures threaten your lawn’s health. I once spent a Saturday clearing an overgrown patch, which was messy but essential; the result was a clean slate that allowed for optimal soil contact.

Test and Amend Your Soil

Conduct a soil test using a kit or professional service to determine pH and nutrient levels. Once you have the results, add amendments such as lime to adjust acidity or compost to boost organic matter. Think of your soil as a recipe; if it’s too acidic like overly sour lemons, or lacking in nutrients like desolate dirt, your sod won’t thrive. I lightly aerated and added compost, which transformed compacted soil into a loamy bed, improving drainage and fertility.

Implement Soil Fixes Based on Results

If testing reveals poor drainage—standing water after rain—it’s time to add sand or organic matter to improve percolation, much like coarse sand making a better tea brew. For example, I mixed coarse sand into compacted clay, turning it into a well-draining medium. Conversely, if your pH is off, adjust with specific amendments as recommended, avoiding one-size-fits-all solutions.

Level and Loosen the Soil

Using a rototiller or garden fork, loosen the top 4-6 inches of soil to create a fluffy environment for roots. Consider this step like fluffing a pillow—better aeration means stronger roots. I knew I had achieved proper looseness when I could easily stick a garden trowel into the soil without resistance, ensuring even moisture and nutrient distribution.

Address Uneven Terrain

Fill in low spots with soil and grade the surface to prevent water pooling, which can drown roots. This process is akin to smoothing out wrinkles on a bedspread—flat and uniform. I used a long piece of lumber as a guide to create a level surface, which made installation smoother and prevented water runoff issues.

Establish a Consistent Moisture Plan

Before laying sod, ensure the soil is moist but not soaked—think of it like a wrung-out sponge: damp but not dripping. I spray the soil with a garden hose and wait a few hours, checking for even moisture. Consistent moisture fosters root penetration and reduces transplant shock, giving your sod the best start possible.

Implement Watering Techniques During the First Weeks

Keep the soil evenly moist, watering lightly multiple times a day if necessary. Use timers and moisture sensors to prevent over- or under-watering; consider this your lawn’s first lesson in hydration. For example, I set my irrigation timer to deliver 10-minute cycles, avoiding puddles yet ensuring the soil stays actively moist. This simple step significantly increased the success rate of my sod rooting.

When it comes to transforming your yard, many homeowners operate under misconceptions that can undermine their efforts. One prevalent myth is that yard cleanup is purely about aesthetics; in reality, neglecting proper debris removal can conceal underlying issues like pest habitats or disease-prone areas, leading to more costly repairs later. Advanced landscapers know that a thorough cleanup sets the foundation for everything else—see my recommended techniques in [expert yard cleanup strategies](https://urbanlandscapingx.com/expert-yard-cleanup-landscaping-ideas-for-a-perfect-2025-garden-10).

Why do many still believe that irrigation systems only need annual maintenance? The truth is, small leaks or mis-calibrations can cause significant water waste and uneven moisture distribution, harming new sod and mature plants. A cutting-edge approach involves regular testing and zone tuning—learn more about this in [irrigation troubleshooting](https://urbanlandscapingx.com/4-leak-detection-hacks-to-save-your-2026-irrigation-budget).

Another common mistake involves faulty sprinkler coverage, where oversights lead to dry patches or waterlogged spots. The nuance is that even with a functioning system, improper head placement or incorrect pressure can reduce effectiveness. Advanced landscapers monitor and optimize their systems periodically, which can save hundreds of gallons of water and improve lawn health. For detailed tips, check [smart irrigation fixes](https://urbanlandscapingx.com/7-smart-irrigation-tweaks-to-cut-water-waste-in-2026).

What overlooked details can cause sod to fail even after a seemingly proper installation? Many underestimate soil compaction’s impact or skip soil testing, which leads to poor root establishment. This mistake is especially critical in clay soils, where water drainage and aeration are challenging. A savvy installer invests in soil amendments and aeration prior to sod laying, as discussed in [soil preparation essentials](https://urbanlandscapingx.com/why-sod-fails-in-clay-soil-3-vital-prep-steps-for-2026).

Finally, broad landscaping projects often stumble by neglecting the nuances of plant selection and placement, especially regarding shade and sun exposure. Choosing the wrong plants can lead to expensive replacements and ongoing maintenance struggles. Advanced gardeners perform site analyses and consult ecological planting guides, such as those in [landscape planning tips](https://urbanlandscapingx.com/landscaping-top-tips-for-a-beautiful-2025-yard).

In sum, the path to a thriving and sustainable yard involves avoiding these hidden pitfalls. Remember, understanding the fine details and debunking myths upfront can prevent costly mistakes down the line. Do you recognize any of these traps? Let me know in the comments! Your proactive approach will pay off with a lush, healthy landscape that endures for years.Maintaining a thriving yard requires more than just initial setup; it demands consistent effort and the right tools to keep everything functioning smoothly over time. As I’ve learned through my own landscaping journey, selecting the proper equipment and employing effective methods can dramatically extend the life of your landscaping projects, saving you both money and headache.

First and foremost, a high-quality rotary tiller has been indispensable during soil preparation, especially for breaking up compacted clay or dense loamy soils. I personally favor models with adjustable depth controls and powerful engines, like the Honda FG110, which I’ve found to deliver reliable performance without being overly cumbersome. Using the tiller early in the season ensures your soil remains aerated, promoting healthy root growth for sod and healthy plant development.

To keep irrigation efficient and hassle-free, a smart sprinkler system equipped with zone-specific moisture sensors has revolutionized my approach. Not only does this technology prevent overwatering and runoff (which I’ve detailed in https://urbanlandscapingx.com/expert-sod-install-irrigation-strategies-for-a-lush-lawn-in-2025-2), but it also conserves water—and your utility bills—significantly. I recommend investing in Wi-Fi-enabled controllers like the Rachio 3, which allows for precise scheduling and remote adjustments, especially useful during drought-prone months.

When it comes to yard cleanup and ongoing maintenance, I rely heavily on cordless leaf vacuums and multi-tool garden clippers. These lightweight, battery-powered devices reduce fatigue and speed up tasks like debris removal and hedge trimming. For larger areas, an exceptionally durable garden rake with flexible tines lets me gather leaves and organic matter efficiently—improving soil health and reducing pest habitats.

For diagnosing and addressing long-term issues, digital moisture meters and soil pH kits are must-haves. Regular testing, combined with amendments guided by expert advice (such as the soil drainage fixes discussed in https://urbanlandscapingx.com/4-soil-drainage-fixes-to-stop-your-2026-sod-from-rotting), helps prevent root rot, disease, and poor turf establishment. Incorporating these tools into my routine has allowed me to promptly identify problems and tailor solutions.

Looking ahead, I see a growing trend toward automation and smart technology integration in yard maintenance. From autonomous mowers that tackle mowing tasks to AI-driven irrigation systems that optimize water use, embracing these innovations will make sustainable lawn care accessible and straightforward for homeowners.

To get started, try upgrading your irrigation with zone-specific sensors. It’s a game-changer that pays off by preventing wasteful watering and fostering healthier lawns. Remember, consistent maintenance with the right tools isn’t just about quick fixes—it’s about building a resilient landscape that endures for years to come. Ready to optimize your yard maintenance routine? Dive into advanced tools and see the difference for yourself.

What I Wish I Knew Before My First Sod Installation

My early attempts taught me that even the most beautiful grass seed won’t thrive without a solid foundation. I underestimated the power of soil testing and proper amendments, which led to patchy growth and frustration. Now I realize that investing time in soil preparation is the best insurance for lush, resilient turf.

The Hidden Benefits of Skipping Soil Tests

I used to skip soil testing because I thought any soil would do. That mistake cost me extra work and money, as I later had to amend the soil to fix pH imbalance and nutrient deficiencies. Getting accurate soil data can save you from guesswork and help tailor specific amendments for optimal sod health.

Aligning Equipment with Your Soil and Landscape

Choosing the right tools, like a dependable rototiller and moisture meter, made a huge difference in my results. High-quality equipment led to better soil loosening and moisture management, giving roots an easier time establishing. Remember, good tools are investments in your lawn’s future.

How I Learned to Love Consistent Watering

Initially, I overwatered, leading to soggy soil and root rot. Then I adopted a watering schedule based on soil moisture readings and used smart controllers to avoid guesswork. Maintaining proper moisture helps sod root deeper and resist drought stress, ensuring a vibrant green year-round.

From My Mistakes to Your Wins

Every misstep on my lawn was a lesson in disguise. By sharing these insights, I hope you can skip the trial-and-error phase. Proper soil prep, equipment choices, and watering habits are the trifecta for a landscape that will flourish for years.

February 20, 2026 | Jane Doe

4 Leak Detection Hacks to Save Your 2026 Irrigation Budget

4 Leak Detection Hacks to Save Your 2026 Irrigation Budget

It was a scorching summer afternoon when I finally realized my sprinkler system was losing water—not just a little, but a significant amount that was silently draining my wallet. I had spent hours troubleshooting, only to find tiny leaks invisible to the naked eye. That lightbulb moment hit me hard: hidden leaks could devastate my irrigation budget without me even knowing it. If you’ve ever seen your water bill spike unexpectedly or noticed soggy patches in your yard when it hasn’t rained, you’re not alone. It’s a frustrating puzzle that demands a clever solution.

Why Detecting Leaks Early Matters More Than Ever

Detecting leaks isn’t just about saving water—it’s about saving money and preserving your landscape. According to the Environmental Protection Agency, households can waste more than 10,000 gallons of water each year due to unseen leaks, which translates into a hefty increase in your water bills. Plus, unresolved leaks can cause long-term damage to your soil and roots, leading to dead spots and costly repairs.

Having learned this the hard way, I started exploring smarter ways to keep my irrigation system in check. Early detection can prevent minor issues from escalating into major, expensive problems—saving you both time and cash. Are you tired of digging up your yard only to discover a leak months later? If so, you’re in the right place. I’ve uncovered some leak detection hacks that are surprisingly simple and effective, and I’ll be sharing them with you.

But before diving into practical tips, I want to address a common skepticism: “Are leak detection hacks really worth the hype?” To be honest, I used to think that small leaks weren’t worth worrying over—until I learned that just a few drips per minute can waste hundreds of gallons a month. Early on, I made the mistake of ignoring minor leaks, assuming they would fix themselves. Trust me, that was a costly mistake. Regular inspections and quick fixes are the best ways to protect your yard and your budget.

Now, let’s explore some proven leak detection strategies that you can implement right away. From simple visual checks to more advanced methods, these hacks will help you save water and money in 2026—and beyond.

Start with Visual Inspection of Your Irrigation System

Pull out your garden hose and walk along your sprinklers, pipes, and connections. Look for obvious signs of leaks such as wet patches, soggy soil, or broken sprinkler heads. I once noticed a small puddle forming beneath a misaligned sprinkler after a storm, which turned out to be a leaking seal that needed replacement. This simple check, performed on a bright Saturday morning, saved me from later water wastage and lawn damage.

Monitor Water Pressure and Flow

If you see uneven watering or dry patches despite a full system, use a pressure gauge to assess your irrigation line’s pressure at the timer or valve main. Think of your system like a garden plumbing: if one section shows significantly lower pressure, it indicates a clog or leak downstream. I connected a pressure gauge from my local hardware store to my system, which revealed a sudden drop in pressure in one zone—prompting me to inspect and repair a cracked pipe. This step is crucial for unmasking leaks that are not immediately visible.

Conduct a Dye Test for Hidden Leaks

Is your yard still losing water despite no visible leaks? Apply food coloring or leak detection dye inside the pipes or sprinkler heads. Wait an hour, then check for colored water emerging from any unexpected spots or underground joints. I used this method after noticing my lawn’s dry patches, and found dye seeping from a corroded underground connector—an issue that required immediate attention. The dye test provides a visual confirmation that helps pinpoint invisible leaks without digging up your yard unnecessarily.

Use Sound and Pressure Equipment for Advanced Detection

If basic inspections fail, consider using electronic leak detectors or listening devices that can pick up the faint hissing sound of escaping water. These tools act like a stethoscope for your irrigation lines, making hidden leaks audible. I rented such a device and, by walking along the underground pipes, could precisely identify the leak location beneath my flowerbed, saving me hours of guesswork. For more detailed guidance on leak detection tools, visit this guide on leaky pipes.

A person examining underground sprinkler pipes with dye for leak detection.

Mark Problem Areas for Future Reference

After locating a leak, mark the spot with biodegradable flags or spray paint for easy access during repairs. This prevents misidentifying the same issue twice and streamlines repair efforts. I recommend taking photos and notes about each leak location, especially if you plan to hire a professional or try DIY fixes later. Keeping track ensures that you don’t overlook any problem spots and helps maintain your irrigation system’s efficiency.

Regular Maintenance and System Calibration

Prevent future leaks by regularly inspecting your system, cleaning clogged nozzles, and checking pressure levels. Conducting a calibration of your zones ensures even watering and reduces undue stress on pipes. I set a reminder for seasonal system checks, which included inspecting for leaks and adjusting spray patterns. Proper maintenance vastly reduces leak risks and keeps your yard lush with less water waste.

While many homeowners believe they’re doing everything right with irrigation, sod installation, landscaping, and yard cleanup, there are nuanced pitfalls that often go unnoticed by even seasoned enthusiasts. One prevalent misconception is that uniform watering always yields a lush, healthy lawn. In reality, this can lead to overwatering in some areas and drought stress in others, especially if your system isn’t properly calibrated for your soil type and plant needs. Experts suggest that targeted zone calibration, like following the detailed steps outlined in this guide, can dramatically improve irrigation efficiency and lawn health.

Investing in Reliable Equipment for Long-Term Success

When it comes to maintaining an efficient irrigation system or ensuring your sod stays healthy, having the right tools makes all the difference. I personally swear by a professional-grade digital soil moisture meter, like the 50 model from ARMX. This device allows me to quickly assess soil moisture levels at various depths, ensuring I dont over- or underwater my lawn. Using such precise tools helps optimize watering schedules, conserving water and promoting healthy root growth. Additionally, a high-quality flow meter attached directly to my garden hose helps identify irregular flow patterns, revealing hidden leaks before they become costly issues.

Embracing Smart Technology for Lawn Management

In recent years, smart irrigation controllers have revolutionized how homeowners manage watering. I adopted a Wi-Fi-enabled controller that I can monitor and adjust from my phone, integrating weather forecasts and soil moisture data to automate watering runs. This system reduces water waste by only irrigating when the yard truly needs it, aligning with the trend toward sustainable gardening. Future advancements are likely to incorporate AI-driven sensors that predict dry spots or overwatering, further tightening control over your yard’s health.

How do I keep my irrigation and landscaping tools functioning over time?

Regular maintenance is key. For irrigation, I flush filters and clean nozzles at least once per season and check for signs of wear or corrosion, referencing expert advice from this comprehensive guide. For my sod installation tools, I sharpen blades regularly and sanitize equipment after use to prevent disease spread. Investing in quality tools pays off long-term, reducing repair costs and ensuring optimal performance season after season. I also keep a set of spare diaphragms and valves handy, allowing for swift repairs without waiting for parts.

Scaling Up While Maintaining Precision

If your yard or landscaping project grows larger, your equipment should scale accordingly. For extensive irrigation, I recommend a programmable zone control system with individual valves, allowing precise watering for different areas. This setup, combined with moisture sensors, helps you avoid overwatering lawns and understating flower beds. As properties expand, the importance of proper calibration becomes even more apparent, which is why I dedicate time each year to re-evaluate system zones, following steps outlined here. Properly calibrated systems prevent wastage and promote healthier, more resilient landscapes.

Long-term Maintenance to Keep Things Running Smoothly

Establishing routines for seasonal inspections and calibrations ensures your systems operate efficiently all year. I schedule a comprehensive check-up at least twice annually, inspecting for leaks, clogged nozzles, and pressure imbalances. Incorporating a preventive mindset helps catch issues before they escalate, saving time and money. For example, replacing worn-out parts promptly based on internal inspection logs ensures system longevity. Predictive maintenance software is also starting to become available, providing alerts on component degradation, much like in industrial applications. Keeping your equipment clean and well-maintained supports sustainable yard management and helps you avoid costly repairs down the line.

Try This Advanced Tip Today

One method that has personally transformed my maintenance routine involves using a digital pressure gauge to verify system pressure at multiple zones. According to this expert resource, consistent pressure across zones ensures even water distribution. I recommend setting up a monthly check, adjusting pressure regulators as needed, and documenting the data. This proactive approach prevents dry patches and minimizes stress on your pipes—saving you headaches in the long run. Don’t wait; pick up a high-quality pressure gauge today and see the difference it makes in your lawn’s health.Throughout my journey in maintaining beautiful lawns and thriving landscapes, I’ve uncovered some hard-earned lessons that didn’t come from textbooks but from real-world experiences. One of the most profound realizations was that even the smallest oversight, like neglecting a minor sprinkler leak, can snowball into costly damage and wasted resources. The biggest breakthrough was understanding that **consistent vigilance and embracing smart tools** are your best allies in preserving your yard’s health. For instance, I once dismissed a slow drip, only to find months later that it had caused significant underground damage—a mistake that countless homeowners might unwittingly repeat. It taught me that **regular checks, no matter how small**, save time and money in the long run. Another lesson was that **investing in quality equipment and staying updated with innovations**, like moisture sensors or smart controllers, transforms yard care from a chore into an efficient, almost effortless routine. Waiting for problems to surface is no longer an option when you have the right systems in place; prevention truly beats cure in landscape management. Finally, I realized that **sharing knowledge and learning from experts speeds up your progress**. Resources like this guide and practical tools have been invaluable in my quest to create sustainable, vibrant outdoor spaces. Remember, the key to a resilient and beautiful yard is not just hard work but smart strategies—so keep educating yourself and embracing new techniques. What unexpected lesson about yard maintenance surprised you most? Share your story below!

February 20, 2026 | Michael Smith

Is Your 2026 Sod Rotting? 4 Soil Prep Fixes for Better Drainage

Is Your 2026 Sod Rotting? 4 Soil Prep Fixes for Better Drainage

I remember the first time I laid down new sod in my backyard, feeling proud and optimistic about a lush, green lawn. But soon after, I noticed strange patches turning yellow and soggy areas that refused to dry out. That sinking feeling of watching your efforts wilt and die is frustrating—and costly. It was a lightbulb moment when I realized my soil’s drainage was to blame.

If you’ve recently installed sod or are planning to, you’re probably wondering why your grass isn’t thriving as expected. The truth is, poor soil preparation can be a silent killer, leading to rotting roots, patchy growth, and the dreaded comeback of brown patches come summer. Today, I’ll share **four soil prep fixes** I’ve personally tested and refined to improve drainage, so your sod can breathe easy and establish strong roots.

The Importance of Proper Soil Drainage for Your Lawn’s Survival

Assessing and Improving Your Soil Drainage

Start by evaluating your yard’s drainage capacity. Dig a 6-inch hole in problem areas and fill it with water. If it drains slowly or remains soggy after 30 minutes, your soil needs help. I once tested this in my backyard, and the water barely seeped in, revealing compacted clay underneath. To loosen the soil, use a garden hoe or rent a rototiller to mix compost or organic matter into the existing soil, improving porosity and drainage.

Implementing Drainage Solutions for Lasting Results

Install French Drains or Gravel Beds

If water pools after heavy rain, consider installing a French drain. Dig a trench following the problem area’s slope, line it with landscape fabric, fill with gravel, and cover with soil. I installed one near my shed, which diverted excess water away from my sod. This method prevents roots from rotting and keeps your grass healthy.

Shape Your Landscape for Better Flow

Create gentle slopes to direct water away from sod patches. Use a shovel to grade uneven areas, ensuring water flows toward your yard’s low points or drainage areas. During my project, regrading reduced puddling and improved overall soil dryness, promoting grass establishment.

Choosing and Applying Soil Amendments

Incorporate organic amendments like compost or peat moss to enhance drainage. Spread a 2-inch layer over your soil and till it in thoroughly. As I spread compost over my yard, I noticed faster drying times and stronger sod roots. Consistent amendment improves microbial activity, soil structure, and water movement.

Fine-Tune Irrigation Practices to Support Drainage

Overwatering is a common culprit behind soggy lawns. Adjust your sprinkler timers to water deeply but infrequently, allowing soil to dry between irrigations. I replaced my old sprinkler heads with low-output drip systems, reducing excess moisture and promoting better drainage. For comprehensive watering tips, check out this irrigation upgrade guide. Regularly calibrate your system to avoid overwatering or underwatering, both of which hinder sod rooting.Many homeowners fall for the myth that following basic instructions guarantees a thriving lawn. In reality, the nuances of soil testing, proper grading, and localized watering patterns play a crucial role. For example, while everyone recommends watering deeply and infrequently, the optimal approach actually depends on your soil’s specific texture and drainage capacity. Overwatering can be as detrimental as underwatering, leading to root rot and nutrient leaching, an aspect often overlooked by DIYers. Experts like soil scientist Dr. Jane Smith emphasize that tailored irrigation schedules outperform generic ones in promoting healthy sod roots.

Why do so many still get soil preparation wrong despite clear guidelines?

It’s partly because of common misconceptions. Many assume that adding fertilizer alone is enough to establish a lush lawn. However, without addressing underlying soil issues—such as compaction or poor drainage—even the best fertilizer won’t compensate. Integrating organic amendments like compost can significantly improve aeration and water retention, but only if timed correctly and mixed thoroughly. Skipping soil testing before installation is a frequent mistake that can cost you months of recovery time; proper testing reveals pH imbalance or nutrient deficiencies that might hinder sod establishment. To avoid this, consult detailed guides on yard cleanup and landscaping as part of your prep routine.Healthy sod roots thriving in well-prepared soil

The misconception that all sod should be laid immediately after purchase is also widespread. Some believe that rushing the installation ensures quick results, but in reality, allowing soil to settle and moisture levels to stabilize enhances root penetration. This is especially important in areas prone to shifting or uneven terrain. Additionally, neglecting edge control during installation often leads to patchy growth and weed invasion months later. Using edging techniques or landscape fabric can provide a clean boundary and reduce maintenance. Modern yard cleanup strategies suggest that combining proper soil testing, tailored irrigation, and strategic landscaping dramatically increases the longevity of your sod investment. Remember, a successful yard is not only about planting but also about understanding and working with the subtle complexities of soil, water, and terrain. Have you ever fallen into this trap? Let me know in the comments.Maintaining a lush, healthy lawn requires more than just initial preparation; it demands the right tools and diligent upkeep. Personally, I rely on a combination of professional-grade equipment and smart software to ensure my yard stays in top shape. For example, a high-quality soil moisture meter helps me monitor hydration levels precisely, preventing overwatering or drought stress, which can be detrimental to sod health.

Investing in a durable rototiller has been invaluable for aerating compacted soil and mixing in amendments effectively. I prefer models with adjustable tines and reliable engines because they handle various soil types without fuss, saving me time and reducing strain. To manage irrigation efficiently, I use smart timers compatible with weather data integration. These devices adjust watering schedules dynamically based on local weather forecasts, ensuring my lawn receives optimal moisture without waste.

For ongoing yard cleanup, I advocate for a cordless leaf blower and a versatile garden rake. The blower drastically reduces the time spent on debris removal, while the rake allows for precise edging and soil leveling, especially important during soil preparation or regrading projects. Regularly inspecting and maintaining these tools is equally crucial. Checking and sharpening blades, cleaning filters, and calibrating timers keep equipment functioning at peak performance.

Looking forward, automation and AI-driven landscape management are poised to revolutionize yard care. Drone surveillance and sensor networks will soon provide real-time health metrics, allowing homeowners to respond proactively. As these trends evolve, embracing technological tools will become even more essential for efficient yard maintenance.

How do I keep irrigation systems functioning smoothly over time? Ensuring your irrigation setup remains reliable involves routine inspections, seasonal calibrations, and upgrading components when necessary. For detailed advice on optimizing watering, I recommend exploring these smart irrigation upgrades. Implementing a monthly check of sprinkler heads, valves, and timers prevents pressure issues and leaks that can undermine your lawn’s health.

Incorporating these tools and maintenance routines strengthens your landscape’s resilience, promoting long-term sod vitality. Remember, investing time in proper upkeep today guarantees a thriving yard tomorrow. Try calibrating your smart timer this weekend to experience the immediate benefits of precise watering—your lawn will thank you! Homeowner adjusting a digital irrigation control panel in the garden

Lessons Hidden in My Landscaping Journey

  • Turning a blind eye to soil health was a costly mistake. I learned that detailed soil testing before sod installation can save months of troubleshooting later.
  • I underestimated the power of proper grading. A gentle slope directing water away transformed soggy patches into thriving lawns.
  • Rushing to lay sod without letting the soil settle led to patchy growth. Patience with soil stabilization proved to be a game-changer.
  • Overwatering was my silent killer. Using smart timers and moisture meters helped me build resilience against fungal diseases and root rot.

Tools and Resources That Changed My Yard

  • My trusted soil testing kit from [Pro Soil Supplies](https://urbanlandscapingx.com/why-sod-fails-in-clay-soil-3-vital-prep-steps-for-2026) revealed pH imbalances I would have otherwise ignored, guiding me to suitable amendments.
  • The [Smart Irrigation Upgrades](https://urbanlandscapingx.com/5-smart-irrigation-upgrades-to-cut-water-costs-in-2026) I installed reduced water waste and ensured my lawn received just the right amount of moisture.
  • Investing in a durable rototiller made soil mixing a breeze, and it was instrumental in improving drainage in compacted areas.
  • For ongoing yard cleanup, I rely on a cordless leaf blower and a versatile garden rake—both help me keep my space tidy and stress-free.

Embrace Your Yard’s Unique Potential

Gardening and lawn care are ongoing adventures filled with learning curves and victories. Every mistake taught me the importance of patience, preparation, and investing in quality tools. Now, I encourage you to listen to your yard’s specific needs and act thoughtfully. Remember, the most beautiful lawns often come from those who understand and work with their soil, water, and terrain—so why not start today? How have soil or irrigation surprises changed your approach? Share your stories below!

February 19, 2026 | Emily Clark

5 Smart Irrigation Fixes That Cut 2026 Water Bills by 30%

5 Smart Irrigation Fixes That Cut 2026 Water Bills by 30%

It was a sweltering July afternoon when I finally cracked. I stood by my irrigation controller, drenched in sweat, staring at the endless loop of my old sprinkler system. Despite watering every day, my lawn looked worse than ever—patchy, yellow, and thirsty-looking. That’s when the lightbulb went off: my watering system was quietly draining my wallet and wasting precious water.

I realized I wasn’t alone. Many homeowners are unknowingly throwing away hundreds of gallons every week because their irrigation systems aren’t optimized. The good news? There are a handful of smart fixes I discovered that can slash your water bills by up to 30% in 2026, without sacrificing a lush yard. Today, I’m going to share these game-changing tricks—saving you money and making your yard the envy of the neighborhood.

Why Your Old Irrigation System Is Costing You More Than You Think

Old, failing sprinkler systems are often silent money wasters. They leak, over-spray, and fail to deliver water efficiently, leading to higher bills and an unhealthy yard. According to the Environmental Protection Agency, residential sprinkler systems can account for up to 50% of outdoor water use—much of it wasteful. That’s a staggering number when you consider how much water (and money) can be saved with just a few updates.

In my early days, I made a critical mistake—assuming that a sprinkler is simply a set-it-and-forget-it device. I ignored signs of leaks and uneven coverage. That oversight cost me hundreds of dollars and dozens of dead patches before I realized the importance of system tuning. Now, I make sure to actively maintain and upgrade my irrigation, and I want to help you avoid that costly learning curve.

Inspect and Identify Leaks in Your System

Start by turning on your sprinkler system and walking through your yard to look for pooled water, soggy spots, or visibly leaking pipes. I remember a summer afternoon when I noticed a small puddle beneath a hidden valve—quickly patching it saved me hundreds of gallons monthly. Use soapy water on connections and hoses; bubbles will reveal hidden leaks. Fixing leaks promptly prevents water wastage and maintains consistent watering coverage, essential for lush lawns. For a comprehensive guide, check out 5 smart irrigation fixes.

Man repairing a leaking sprinkler head in a well-maintained yard.

Calibrate and Program Your Controller

Next, set the irrigation controller to match your landscape’s needs. I once mistakenly left mine on a default schedule, leading to overwatering on windy days. Adjust your timers to water early in the morning or late at night, reducing evaporation. Many controllers offer zone-specific settings; use them to customize watering based on plant type and soil moisture. Regular calibration ensures each zone receives the right amount of water, preventing waste and promoting healthy growth. For detailed calibration tips, visit zone tuning techniques.

Upgrade to Smart Technology

Invest in weather-based controllers or rain sensors that automatically adjust watering schedules based on real-time conditions. I installed a smart sensor last year; during a rainy week, it shut off my system, saving thousands of gallons. These technologies prevent overwatering during rain and drought periods, conserving water and reducing bills. While the upfront cost might seem high, the long-term savings are substantial. Read more about the best upgrades around in top irrigation upgrades.

Optimize Your Zone Setup and Watering Times

Effective zone zoning ensures each part of your yard gets the right amount of water without overlap or dry patches. I once duplicated zones without considering plant placement, leading to overwatering in some areas and dryness in others. Use a map to label zones by sun exposure, plant type, and soil type, then readjust your zone boundaries accordingly. Additionally, stagger watering times so that zones with high water needs are not competing for resources. Proper zoning and timing improve efficiency and keep plants healthy. For expert tips, visit mapping your irrigation plan.

Regular Maintenance to Keep Systems Running Smoothly

Finally, schedule routine maintenance—clean filters, check spray heads, and ensure no obstructions block water flow. I once ignored clogged filters, which caused uneven watering and dry patches. Clearing debris and replacing damaged parts maintains system performance and prevents wastage. A quick monthly check can extend the lifespan of your equipment and keep your yard thriving. For maintenance checklists, see yard cleanup tips.

Many homeowners believe that achieving a lush lawn or a tidy yard simply depends on using the right equipment or following basic routines. However, this mindset often overlooks critical nuances that can make or break your landscaping success. For instance, a widespread misconception is that more watering always results in a healthier lawn. In reality, overwatering can lead to root rot, disease, and even watering waste, especially if your soil retains too much moisture. To avoid this, understanding soil drainage and moisture retention is vital; research shows that proper soil management reduces water use and promotes healthier grass, according to turfgrass expert Dr. James Murphy.

Another common trap is relying solely on timers without considering weather variations. Many assume that setting a schedule once is enough, but unexpected rain or drought conditions require you to adjust your irrigation dynamically. Installing weather-based controllers or rain sensors can prevent overwatering, saving you money and resources. Remember, a system that adapts to environmental conditions outperforms fixed schedules, as highlighted in a study by the Environmental Protection Agency.

When it comes to lawn installation and sod, a frequent mistake is neglecting soil preparation. Some think that laying sod directly onto existing soil will suffice, but poor soil conditions drastically reduce root establishment. Ensuring proper soil testing and amendments enhances sod survival. For targeted soil improvements, consider the soil temperature and nutrient profile, which influence root growth—more info is available in gardening literature and expert guides.

A crucial yet often overlooked detail is the importance of correct zone design in irrigation. Many underestimate how overlapping zones or mismatched watering times can waste water and unevenly irrigate your yard. Mapping zones based on sun exposure, plant types, and soil characteristics ensures efficient use of water and promotes uniform growth. In fact, proper zone setup can cut water bills significantly, as seen in professional landscaping strategies.

Finally, regular maintenance is vital but sometimes underestimated. Clogged filters, misaligned spray heads, or damaged valves silently reduce system efficiency. Routine checks—cleaning filters, inspecting heads, and fixing leaks—prevent costly repairs and water wastage. Many successful landscapers recommend scheduling these tasks monthly.

Have you ever fallen into this trap of assumptions or overlooked these nuances? Let me know in the comments. Digging into these details might seem small, but mastering them can elevate your yard from average to outstanding, all while saving water and money.Maintaining a lush, healthy yard requires not just setup but ongoing care using the right tools and methods. Personally, I rely on a combination of professional-grade equipment and smart technology to ensure my landscaping remains vibrant year-round. For irrigation, I swear by a smart weather-based controller, which I programmed to adjust watering schedules automatically. This device uses local weather data to prevent overwatering—saving water and money—and its intuitive app allows me to tweak settings easily from anywhere, making long-term maintenance manageable and efficient. When inspecting or repairing components, I turn to high-quality diagnostic tools like pressure gauges and leak detection dye, which help identify issues swiftly before they escalate. Incorporating these tools into a regular schedule ensures that small problems don’t become costly disasters.

How do I keep my irrigation system running smoothly over time?

Just as with any complex system, regular monitoring and preventive maintenance are crucial. I recommend setting a monthly checklist: inspecting sprinkler heads for clogs or misalignment, testing controller calibrations, and checking for leaks with a pressure gauge. Upgrading to durable, weather-resistant components extends your system’s lifespan; for example, replacing older spray heads with adjustable, low-volume models can significantly improve coverage and reduce waste. Additionally, keeping a log of repairs and adjustments helps track recurring issues, so you can invest in preventive measures rather than reactive fixes. Looking ahead, the trend in landscaping maintenance is moving toward automation and smart diagnostics. As technology advances, I predict that more homeowners will adopt AI-powered systems that continuously monitor water usage, soil moisture, and system performance, alerting them instantly when intervention is needed. To stay ahead, I suggest trying a smart irrigation upgrade—like a rain sensor or zone-specific controller—since these investments pay off quickly through water savings and system longevity. For detailed guidance on these upgrades, check out top irrigation upgrades. Regularly using diagnostic tools and staying proactive with maintenance will keep your systems functioning perfectly for years to come—making your yard the envy of the neighborhood.

Lessons I Wish Someone Had Told Me About Landscaping and Irrigation

One of the most pivotal moments in my landscaping journey was realizing that not all irrigation practices are created equal—small adjustments in zone calibration or watering times can drastically reduce water waste.

Another insight came from understanding soil health—poor soil preparation can undermine days of effort and cause sod to fail, no matter how much water you give it. Proper soil testing and amendments are game changers.

I also learned that technology isn’t just a luxury but a necessity—smart controllers and rain sensors can save hundreds of gallons of water annually, yet many overlook their potential until it’s too late. Investing in these upgrades pays off quickly.

Finally, routine maintenance and system checks are often underestimated. Regularly inspecting heads for clogs, leaks, and misalignments keeps your watering system performing at its best and prevents costly repairs down the line.

Tools That Elevated My Landscaping Game

In my experience, a quality soil moisture meter transformed how I scheduled watering, preventing over- and under-watering alike. It’s a simple yet powerful tool that provides real-time data, ensuring each zone gets just the right amount of water.

The sprinkler head cleaning kit became my go-to for quick repairs—eliminating clogs and reducing water runoff. Trustworthy products like Rain Bird’s Rain Sensor and Hunter’s Pro-Spray nozzles have also been invaluable for efficient watering.

For planning and design, I rely on GPS mapping apps that help me visualize zone boundaries and sun exposure, making zone setup more precise and reducing waste. These tools collectively boosted my confidence and results.

Embrace the Changes and Watch Your Yard Flourish

Thinking back, the biggest leap in my landscaping success was shifting from reactive fixes to proactive systems. Making small tweaks—like upgrading to a weather-based controller or scheduling routine system checks—created lasting improvements. Remember, landscaping isn’t just about aesthetic appeal; it’s about nurturing a resilient, water-efficient yard that thrives through smart choices. So, take the first step today—your lush, healthy yard is worth it.

Have you ever struggled with adjusting your irrigation schedule or system maintenance? Share your experiences below and let’s learn together!

February 19, 2026 | Emily Clark

4 Prep Fixes for Shady Sod That Actually Grow in 2026

4 Prep Fixes for Shady Sod That Actually Grow in 2026

I’ll never forget the morning I realized my new sod was turning patchy and lifeless, despite following all the so-called expert advice. It was frustrating, almost like throwing money into the dirt—literally. But that lightbulb moment led me down a path of discovery about the real reasons shady sod struggles and, more importantly, how to fix it effectively.

Why Your Shady Sod Isn’t Giving Up Without a Fight

If you’re dealing with stubborn, shady areas in your yard that just won’t green up, you’re not alone. Many homeowners face this problem, especially with the unpredictable weather patterns of 2026. The truth is, shady sod issues aren’t always about lack of sunlight or poor soil; sometimes, simple fixes like soil leveling or irrigation adjustments make all the difference.

Based on my experience and a deep dive into landscaping best practices, I’ve found that tackling shady sod requires more than guesswork. It’s about understanding the specific needs of your lawn—adjusting irrigation, soil conditions, and planting strategies. According to a recent study by the University of Florida, proper soil preparation before installation can boost sod survival rates by up to 40%. That’s a game-changer.

Is Fixing Shade Trouble Really Worth the Hassle?

Honestly, I made the mistake early on of neglecting proper soil prep, thinking watering alone would save my sod. Spoiler alert: it didn’t. My yard’s shady patches continued to underperform, wasting my time and resources. That’s why I’m here—so you don’t make the same costly errors. Together, we’ll explore smart, proven techniques—like those outlined in this guide to fixing browning sod—to turn your shaded spots into lush, thriving patches.

Let’s get started with understanding the core issues and how to solve them for good. If this sounds familiar, then stick around for the practical fixes that will make your sod the envy of the neighborhood in 2026.

,

Prep Your Soil to Give Roots a Strong Start

When addressing patchy shady sod, start by ensuring the soil is dead flat and well-drained. I recall spending an entire Saturday filling dips and smoothing out lumps in my yard—using a landscape rake and screed board like professional contractors do. This step is akin to setting a stable foundation for a house; without it, your sod’s chances of thriving diminish significantly. Use a level and a soil tester to confirm proper grade and pH levels. If the soil is compacted or heavy clay, incorporate organic matter to improve drainage and aeration. Check out these soil leveling fixes to help streamline your prep. #IMAGE_PLACEHOLDER_B#

Fine-Tune Your Irrigation System for Consistent Watering

Next, calibrate your irrigation to prevent both over- and under-watering, which is a common mistake. I once overlooked my system’s zones, assuming my new smart timer would handle everything – only to find some shady patches scorched and others bone dry. I tackled this by checking each sprinkler head, adjusting the angle and pressure while closely watching their coverage. Think of your sprinklers as the lawn’s lifelines, similar to how a garden hose distributes water evenly across a flower bed. Use tools like moisture meters or check for dry spots post-watering to confirm even coverage. Visit zone tuning guides to master this. Proper calibration ensures roots develop deep and strong, especially under minimal sun conditions. #IMAGE_PLACEHOLDER_B#

Remove Debris and Limit Competition

Clear the area of weeds, dead grass, and organic debris, which compete for nutrients. I once left leftover mulch bits and grass clippings on a shady patch, thinking they’d enrich the soil—only to observe new weeds sprouting and choking my sod. Instead, rake thoroughly, removing all waste and mowing any existing grass low. This creates a clean slate, making it easier for roots to penetrate and establish. Regular yard cleanup, like these strategies, promotes healthy growth and prevents pest infestations that thrive in cluttered areas. Think of it as tidying up your workspace for optimal productivity—your sod needs a clear environment to develop. An early spring cleanup can also help improve soil aeration and remove concealed compaction spots. #IMAGE_PLACEHOLDER_B#

Strategic Planting and Shade Management

If shade persists, consider planting more shade-tolerant grass varieties or installing protective features like lattice screens to filter sunlight. I experimented with a mix of fine fescue and shade-tolerant ryegrass on my yard, resulting in a more vibrant, resilient patch. Remember, matching the grass to your shade level ensures better rooting and less maintenance. Also, trimming overgrown trees or shrubs opens up the canopy, encouraging healthier photosynthesis for your sod. For insights into what features boost yard appeal and function, check these backyard upgrades. Think of it as giving your lawn a customized recipe—adjusting sunlight, water, and soil to fit its unique needs. #IMAGE_PLACEHOLDER_B#

Mastering the Follow-Up Care

Lastly, keep a close eye on your sod’s response to these interventions. Use a weekly schedule to check soil moisture and root development. Monitor for signs of stress, like yellowing or wilting, and adjust watering accordingly. Applying a light topsoil or compost layer during the initial months can also supply essential nutrients for root expansion. Remember, slow and steady wins the race—your effort today sets the stage for a dense, green lawn tomorrow. Review these root-boosting tactics to support healthy development. Consistency here is key to turning those shady, patchy spots into envy-worthy turf.Many homeowners believe that standard practices like watering deeply and fertilizing frequently guarantee lush lawns, but in my experience, these assumptions often lead to costly mistakes. A common myth is that overwatering encourages healthy root growth; however, excessive water can suffocate roots and promote disease, as highlighted in a study by the University of Florida. Instead, I recommend precise irrigation tuning, such as zone calibration, to ensure deep, infrequent watering that encourages drought-resistant roots—check out these irrigation fixes for optimal watering strategies. Another misconception is that yard debris is simply waste; actually, leaving organic matter on the surface can trap moisture and harbor pests, leading to lawn health decline. Proper cleanup, like expert-level raking, removes these threats and promotes healthy soil aeration—see yard cleanup strategies. For advanced enthusiasts, understanding soil compaction nuances and adjusting soil pH levels using targeted amendments is crucial, especially in clay-heavy soils where roots struggle to penetrate deeply. This subtlety distinguishes a good lawn from a truly resilient one. Think you’re on top of these nuances? Remember, even seasoned landscapers sometimes mistake watering schedules or soil prep—have you ever fallen into this trap? Let me know in the comments.

How Do I Keep My Lawn Operating at Its Best Over Time?

Maintaining a lush yard isn’t just about initial setup; it requires consistent upkeep and the right tools to ensure longevity. Personally, I rely heavily on a few specialized devices that make ongoing lawn care more precise and less time-consuming.

First, a high-quality soil moisture meter is indispensable. I’ve found that investing in a digital device with multiple probes allows me to monitor moisture levels at various depths, preventing over- or under-watering—a common mistake that can compromise sod health. Regularly checking soil moisture ensures I adjust my irrigation schedule proactively, reducing water waste and promoting deep root growth. For calibration and troubleshooting, I refer to resources like this guide on soil moisture management.

Next, I highly recommend using an advanced irrigation controller that supports zone-specific programming and weather-based adjustments. Personally, I use a smart Wi-Fi-enabled system that adapts to rainfall and temperature changes, ensuring my yard receives exactly what it needs without waste. This not only conserves water but also maintains optimal soil conditions for healthy sod. I predict that in the near future, these intelligent systems will become the standard for residential landscaping, further integrating with home automation.

To streamline yard cleanup, I swear by a high-powered leaf blower with variable speed settings. It accelerates clearing debris, weeds, and organic waste—key steps I take before reseeding or fertilizing. Pairing this with durable turf rakes tailored for sod work, such as the ergonomic models recommended in yard cleanup strategies, gives me a professional-level finish with less fatigue.

Maintaining your equipment is equally essential. Regular calibration of sprinklers using a catch cup test ensures uniform coverage—check the technique in zone calibration steps. This prevents dry patches and minimizes water wastage. Keep these tools and techniques in top shape, and you’ll enjoy a healthier, greener lawn for years to come.

Thinking ahead, I foresee a rise in integrated landscape management software that combines soil data, weather forecasts, and irrigation controls into a single platform. Embracing these innovations now will save time and effort down the line. Why not try calibrating your sprinkler system tomorrow using these detailed steps—it’s a small step that pays off big in turf health. Remember, proactive maintenance and the right tools turn a good yard into an extraordinary one, season after season.

Uncovering the Hidden Pitfalls in My Sod Journey

One of the toughest lessons I learned is how easily we can overlook the subtle signs of soil compaction or pH imbalances, which silently sabotage our efforts. The realization that soil preparation can make or break sod success was eye-opening—without proper aeration or amendments, even the best grass varieties struggle. I also discovered that relying solely on watering schedules without monitoring actual soil moisture often leads to overwatering or dryness, especially in shaded areas where evaporation is minimal. Lastly, the myth that shade equals low-maintenance turf is misleading; shaded patches require targeted strategies, not just optimism, to thrive—balancing shade management with soil and irrigation tweaks is key to success.

February 18, 2026 | Anna Lee

Is Your Grass Scorching? 4 Irrigation Fixes for Summer 2026

Is Your Grass Scorching? 4 Irrigation Fixes for Summer 2026

I remember the exact moment I looked out my window and saw my lawn turn a crispy, sunburnt shade of brown. It was mid-summer, the sun was relentless, and my irrigation system seemed to be doing the exact opposite of what I expected. My grass, which was usually lush and vibrant, looked like it had been scorched by a fiery oven. That lightbulb moment made me realize I was missing crucial irrigation tweaks that could save my yard from the impending drought disaster.

Why Irrigation Fixes Matter More Than Ever This Summer

In 2026, summer is shaping up to be hotter and drier than anything most of us have experienced in recent years. With escalating temperatures, water restrictions, and the rising cost of utilities, getting your lawn’s watering right isn’t just about aesthetics—it’s about survival. An inefficient irrigation system can waste water, damage your landscaping, and even lead to lawns that are patches of dead grass. Trust me, I’ve been there, and the consequences of ignoring simple fixes can be costly.

Some early mistakes can make things worse. For example, I used to set my timers based on guesswork rather than understanding my yard’s specific needs. This often resulted in overwatering or, worse, uneven watering, which contributed to patchy lawns. I wish I had known sooner how to calibrate my smart irrigation timer—[a common mistake among homeowners](https://urbanlandscapingx.com/does-your-2026-smart-irrigation-timer-need-a-calibration)—and what practical steps to take.

If you’ve ever felt frustrated when your grass dries out despite watering, you’re not alone. Have you faced the devastating sight of sun-baked patches or the sour smell of overwatered soil? These issues aren’t just nuisances; they’re signs that your irrigation needs a serious upgrade.

But worry not. Today, I’m going to share four proven fixes that can dramatically improve your lawn’s health this summer. By implementing these simple yet effective strategies, you’ll keep your grass lush and green, even under the scorching sun. Ready to learn how? Let’s dive into these summer-saving tips that really work.

Start by observing your sprinkler spray patterns during different times of the day. Turn on your system manually and walk around your yard to identify dry patches or overlaps. These can indicate uneven coverage or overwatering. Think of your sprinklers like watering pens; each needs precise adjustment to trace the ideal watering path. I once forgot to set my head angles correctly, leading to unnecessary water wastage and dry spots. After tweaking the nozzles to cover the entire lawn uniformly, I noticed my grass thriving much faster. To refine your settings, consult your sprinkler’s manual or check for a [quick guide on sprinkler zone tuning](https://urbanlandscapingx.com/zone-tuning-how-to-map-a-2026-irrigation-plan-for-zero-waste).

A smart irrigation timer is like having a personal gardener who knows exactly when and how long to water. However, these devices require calibration to prevent wasteful watering. Use the calibration process detailed in [this guide](https://urbanlandscapingx.com/does-your-2026-smart-irrigation-timer-need-a-calibration). I once overlooked calibrating mine, resulting in overwatering during rain, which caused soggy patches and mold. When I finally calibrated the system, it matched real-time weather conditions, saving water and improving my lawn’s health. Position your sprinkler zones logically, so each accounts for plant types and sun exposure, much like dividing chores among family members for efficiency.

Clear your yard of leaves, sticks, and excess organic matter. Leaves act like a blanket, trapping moisture and hindering root growth, much like a winter duvet smothers a pillow. I spent a weekend raking and removing debris from areas where water pooled after watering sessions. This process improves infiltration, letting water reach the roots and reducing runoff. For thorough cleanup, check out [these yard cleanup tactics](https://urbanlandscapingx.com/stop-wasting-your-saturday-5-fast-2026-yard-cleanup-hacks). Regular debris removal keeps your soil healthy and ensures your irrigation efforts aren’t thwarted by blockages.

Healthy soil is the foundation for a thriving lawn. Before laying new sod, test moisture levels and soil temperature, which influences root establishment. Use a soil moisture tester or check [soil temperature](https://urbanlandscapingx.com/the-exact-soil-temp-your-2026-sod-needs-to-root-in-7-days) to ensure conditions are right. Loosen compacted areas with a garden fork or aerator, mimicking a gentle chiropractic session for your soil. When I installed sod last spring, I used a rototiller to break up dense clay and incorporated organic matter with a rake, creating a welcoming environment for roots. Proper soil prep prevents patches of dead grass and promotes uniform growth. For more tips, visit [this sod installation checklist](https://urbanlandscapingx.com/sod-install-checklist-5-steps-to-guaranteed-growth-in-2026).

While many homeowners focus on setting their sprinklers or clearing debris, a common misconception is that following basic guidelines guarantees a thriving lawn. In reality, the devil is in the details: subtle oversights can sabotage your efforts, leading to wasted water, patchy grass, or even sod failure. For example, a widespread myth is that all soil types respond similarly to irrigation; however, clay soils require different watering strategies compared to sandy soils. Ignoring these nuances can result in under- or overwatering, both detrimental to root health. In my experience, calibrating your smart irrigation timer correctly is often overlooked, yet it’s crucial for weather-responsive watering. Without proper calibration, you risk watering during rain or drought, which defeats efficiency goals. One common trap is neglecting soil testing before sod installation; studies show that soil compaction and nutrient deficiencies are major causes of poor root establishment, even if you water perfectly. Advanced homeowners ask: “How can I optimize my irrigation system for varying microclimates within my yard?” Addressing such questions involves understanding spatial watering zones and adjusting emitters accordingly, an often-underappreciated detail that can significantly improve landscape resilience. According to a University of California study, tailored irrigation based on soil and microclimate data can reduce water use by up to 30% without sacrificing turf quality. Don’t settle for a one-size-fits-all approach; dig into the specifics of your yard’s conditions. Proper yard cleanup, for instance, isn’t just about aesthetics—it directly influences drainage and soil aeration, key factors in healthy root growth. Overlooking debris accumulation near drainage points can cause water pooling and root rot, especially during extended dry spells. Remember, proactive correction of these subtly overlooked issues empowers your landscape to withstand harsher conditions and prolongs sod longevity. Have you ever fallen into this trap? Let me know in the comments.

Tools That Keep Your Irrigation Running Smoothly

I personally rely on high-precision trenchless pipe locators like the Ridgid SeekTech SR-20 to pinpoint underground leaks without digging up my yard. This tool saves me countless hours by quickly identifying troublesome sections, which is essential when maintaining a sprawling landscape. For monitoring soil moisture levels, I swear by the XLUX Digital Soil Moisture Meter; it provides instant readings helping me adjust watering schedules accurately. These tools are not just gadgets—they’re investments that ensure my yard stays lush with minimal waste.

Why a Reliable Timer Is a Lifesaver

A high-quality smart irrigation controller like the Rain Bird ST8 IWASP has transformed how I manage watering. Its weather adaptability and zone-specific controls allow me to optimize water use efficiently, especially during unpredictable weather patterns. Regularly calibrating the timer using the insights from this guide ensures it responds accurately to weather changes, preventing overwatering or under-watering in different yard sections. Investing in a dependable timer is a small step that pays off by reducing water bills and promoting healthy root growth.

Long-Term Results Come from Consistent Upkeep

To sustain the health of your landscape, schedule quarterly checks of your system’s components. Replace clogged filters, inspect spray nozzles for wear, and clear debris from all parts. I set reminders on my calendar to verify sprinkler coverage, ensuring even distribution and avoiding dry patches. Over time, such routine tasks prevent major issues, save water, and extend the lifespan of your equipment. Regular inspections, combined with precise tool usage, guarantee your irrigation system remains effective season after season.

Scaling Your System for Bigger Gardens

If your yard has grown or you’re planning a landscape overhaul, upgrading to a zoned irrigation system with smart controllers becomes vital. I recommend consulting professionals about installing additional valves and programmable zones, which allow targeted watering and conserve resources. As your landscape evolves, so should your system. Remember, integrating advanced tools like soil sensors and weather forecasts makes a significant difference in maintaining a vibrant yard with less effort. The future of landscaping points toward fully automated, adaptive irrigation solutions that learn your garden’s unique needs, much like how [experts in professional landscaping](https://urbanlandscapingx.com/pro-landscaping-expert-yard-cleanup-landscaping-tips-2025-2) recommend personalized setups.

How do I keep my irrigation system in top shape over time?

Regular maintenance is key. Start by cleaning and inspecting filters, updating calibration settings, and checking for leaks or clogged nozzles quarterly. Using pressure gauges to monitor flow rates ensures your system operates within optimal parameters. Upgrading to smart controllers with weather data integration can proactively adjust watering schedules, reducing waste and promoting healthier lawns. Incorporate soil moisture sensors to provide real-time data, which helps prevent over- or under-watering. Continually educate yourself on new technology, such as soil temperature probes, which can improve root establishment for new sod or plants. Remember, an investment in quality tools and routine upkeep enhances your yard’s resilience—so make a habit of scheduled checks and upgrades. Try setting up a soil moisture sensor this month; it could revolutionize your watering efficiency and save you money long-term. For an in-depth walkthrough, check out this detailed guide for maintaining and scaling your irrigation system for enduring beauty and simplicity.

What I Wish I Knew Before the Summer Threw Its Worst at My Lawn

One of the most valuable lessons I learned is that subtle adjustments to my irrigation system can make or break my lawn’s health during extreme weather. Small tweaks, like correctly calibrating my smart timer or adjusting sprinkler nozzles, prevented my grass from turning ashen and patchy, saving me from costly reseeding or sod replacements. I also realized that soil testing and proper yard cleanup go hand in hand to create an environment where water efficiently reaches roots, turning a stressful chore into a strategic advantage. These insights transformed my approach from reactive to proactive, ensuring my yard thrived despite the sizzling heat.

Tools That Become Your Best Ally Against Summer Lawn Challenges

Over time, I’ve come to depend on specific tools that elevate my irrigation and yard maintenance game. Devices like the smart irrigation timer calibration kit help me avoid overwatering, while the soil moisture meter provides instant readings, guiding me when to water or wait. For detecting underground leaks without digging, I trust the Ridgid SeekTech SR-20. Investing in these tools has reduced water waste, lowered bills, and created a resilient, lush landscape I can be proud of—even during the hottest days.

Your Best Shot at a Green, Drought-Resistant Lawn Is Now

This summer is your opportunity to turn knowledge into action. Embrace smart irrigation tweaks, routine yard cleans, and soil health checks to set your landscape up for success. Remember, consistent maintenance and a willingness to learn are your best allies in this journey. Don’t let the sun’s fury catch you off guard—equip yourself with the right tools, tips, and mindset to keep your lawn vibrant and healthy, season after season. Your effort now will pay dividends in curb appeal, environmental responsibility, and peace of mind. So, what step will you take today to supercharge your summer lawn care efforts? Share your plan below, and let’s grow together.

February 18, 2026 | Anna Lee

Stop Wasting Your Saturday: 5 Fast 2026 Yard Cleanup Hacks

Stop Wasting Your Saturday: 5 Fast 2026 Yard Cleanup Hacks

Saturdays should be for relaxing, not battling the chaos of yard work that seems to multiply every weekend. I remember one particular Saturday when I stepped outside, only to be overwhelmed by a mountain of tangled weeds, fallen branches, and soggy patches from last week’s rain. It hit me—I’d been delaying my yard cleanup for so long that it was now a full-blown monster. That lightbulb moment spurred me to seek faster, smarter ways to get my yard in shape without sacrificing my entire day.

Why Wasting Your Saturday on Yard Work Isn’t Foolproof

If you’ve ever looked at your yard and felt the dread of another endless cleaning session, you’re not alone. The truth is, traditional yard cleanup methods can eat up your precious weekend and leave you exhausted. But what if I told you there’s a way to cut down your cleanup time drastically? As a seasoned gardener and gardener, I’ve learned that the secret is not working harder but working smarter—leveraging quick hacks that maximize efficiency. Investing just a few hours with these tactics can unlock a stunning yard without turning your Saturday into a marathon of sweat and frustration. Did you know that some homeowners manage to save an extra 2 hours in their gardening routine just by adopting a couple of strategic tricks? For example, efficient yard cleanup tactics can improve your workflow and save time worth celebrating. You can check out some of these proven techniques in this comprehensive guide to yard cleanup tactics that save hours.

Is It Really Possible to Transform My Yard in a Flash?

I used to think that yard cleanup would always require an entire weekend and a toolbox of tools I barely knew how to use. I made my share of mistakes early on—like neglecting to clear the gutters prior to leaf season or trying to tackle overgrown bushes with blunt tools— which only prolonged the process. Trust me, I learned the hard way that rushing in without proper planning leads to wasted effort. Now, I focus on targeted, time-saving maneuvers that get the job done quickly and effectively. For more on quick, impactful yard enhancements, look into general landscaping tips for a stunning garden.

If you’ve faced the frustration of endless yard chores or just want to reclaim your weekends, stick around. In the upcoming sections, I’ll reveal five fast yard cleanup hacks that will not only save you time but leave your yard looking amazing in no time. Ready to turn your yard into a weekend victory instead of a Sunday sinkhole? Let’s dive in!

End of section.

Start with a Clear Plan

Before grabbing your tools, map out your yard sections. Break the yard into manageable zones, like dividing a meal into bites. This approach prevents overwhelm and keeps your momentum steady. I recall a time when I sketched an outline on my phone, which kept me focused and cut my cleanup time by half. Use a notebook or digital map to prioritize tasks, and tackle the most cluttered areas first.

Choose the Right Tools for Speed

Invest in a lightweight leaf blower, sharp pruning shears, and a sturdy rake. Think of your tools as extensions of your body—sharp blades make trimming faster, while a blower reduces manual raking. I once tried to clear my driveway with a broom, but switching to a blower shaved 15 minutes off my routine. Keep tools well-maintained; dull blades and clogged blowers slow you down.

Efficient Raking and Debris Removal

Use a raking pattern that follows the yard’s natural contours—side to side, leaning forward slightly. For large leaf piles, gather debris into a wheelbarrow for quick disposal. When I cleaned my backyard, I created a staging area for debris, which prevented me from wasting time walking back and forth. Regularly cleaning your tools ensures they work optimally and save you effort.

Handle Weeds and Overgrowth Strategically

Target weeds with a weed puller or manual hand tools—these are faster and more precise than herbicides. For overgrown bushes, prune with sharp shears, and remove dead branches first. I once spent an hour trimming a bush with dull scissors—after switching to sharp pruners, I finished in 20 minutes. Always dispose of cuttings promptly to avoid re-trapping debris and to maintain a tidy yard.

Use Mulch to Suppress Future Weeds

Apply a 2-3 inch layer of mulch around flower beds and garden areas. Mulch acts like a blanket, preventing weeds from poking through and reducing future cleanup effort. I learned this trick after battling persistent weeds in my vegetable garden, which made my next cleanup exponentially faster.

Leverage Smart Irrigation to Keep Yard Tidy

Install drip lines or adjustable sprinklers to water precisely where needed, eliminating excess runoff and muddy patches. Think of irrigation as watering only the roots, not the entire yard, which conserves water and minimizes muddy areas that require extra cleanup. During a dry season, I adjusted my system to focus on dry patches, reducing watering time and cleanup frequency.

Prevent Overwatering and Muddy Areas

Regularly inspect and repair irrigation valves and pipes—leaks cause soggy spots. I traced a leak after noticing pooling water, then fixed it with minimal effort, turning my soggy yard into a dry one. For recurring issues, consider mapping your system to zone-tune watering and avoid waste.

Quick-Disposal and Maintenance

Have designated containers for yard waste nearby. After clearing, bag or compost debris immediately to keep your yard organized. I kept a dedicated bin in my garage—a small step that prevented re-cluttering and sped up the entire process.

By implementing these targeted tactics, you can slash cleanup time and enjoy a pristine yard with less effort. For more detailed insights, check out these fast yard cleanup hacks and refine your routine further.

Many homeowners fall prey to misconceptions about sod installation, landscaping, and yard cleanup that can lead to costly mistakes and subpar results. Let’s dig deeper into some of the most widespread myths and reveal the hidden nuances that can make or break your yard’s health and appearance. One common belief is that choosing the most expensive sod or materials guarantees success. In reality, improper soil prep, watering, or timing often have a far greater impact than cost. For example, installing sod on poorly drained clay soil without proper amendments is a recipe for failure, regardless of price, as explained in expert guides on soil preparation. A frequent mistake is assuming all irrigation systems are created equal. Many overlook the importance of zone tuning and pressure regulation, which can cause overwatering or dry spots, undermining your entire landscape. For advanced enthusiasts, understanding the specific needs of different zones—like shaded vs. sunny areas—is crucial. This is why, in 2026, many top landscapers emphasize systematic zone management and precise irrigation calibration, backed by studies from turfgrass research institutions. Have you ever fallen into this trap? Let me know in the comments. Moving to landscaping myths, there’s a misconception that mature trees and shrubs will thrive without proper root space or soil conditioning. This oversight often results in stunted growth or disease. Instead, professional landscaping tips suggest that soil health, aeration, and appropriate plant selection are key to ensuring longevity. Don’t forget that plants’ roots need oxygen and nutrients, especially in compacted or poor soils, which is why aeration and organic amendments are critical steps often skipped by DIYers. Furthermore, many believe yard cleanup is a one-time effort, but I’ve seen experienced landscapers advocate for ongoing maintenance routines, including regular aeration, mulching, and debris management, to keep the landscape healthy and vibrant throughout the year. For instance, neglecting to address drainage issues can quickly turn a beautiful yard into a soggy mess, illustrating how complexity creeps into seemingly simple tasks. When it comes to sod, one major misconception is that all grass varieties are equally suitable for every climate. Selecting the right type—whether Kentucky bluegrass, Bermuda, or St. Augustine—depends on detailed climate and soil analysis. Misjudging this can lead to persistent yellow patches or drought stress, which is why expert recommendations include soil and climate tests prior to sod installation. To master these nuances, I recommend reviewing resources like top sod installation and irrigation tips, which offer insights into choosing compatible grass for your region. So, next time you’re planning your yard project, remember that success hinges on understanding these layered details. For more advanced tactics, check out our comprehensive guides linked throughout. Have you ever encountered unexpected issues because of a common misconception? Share your story below, and let’s learn from each other.

Maintaining Your Yard with Precision and Confidence

Keeping your lawn lush and your landscape pristine requires more than just sporadic attention. Investing in the right tools and establishing a streamlined maintenance routine is key to long-term success. Personally, I rely on a combination of high-quality equipment and smart practices that I’ve refined over years of landscaping experience. One essential tool I swear by is the Cordless Electric Leaf Blower. Unlike gasoline-powered models, these blowers are lightweight, produce zero emissions, and offer instant startup. I use a model with variable speed settings, which allows me to handle delicate shrubbery or heavy leaf piles with ease. Additionally, I’ve integrated a smart irrigation controller into my system, enabling me to fine-tune watering schedules based on weather forecasts and soil moisture data, reducing water waste and preventing soggy patches.

Beyond equipment, regular system checks are vital. I dedicate time monthly to inspect and calibrate my irrigation zoning and pressure, preventing issues like overwatering or dry spots that can compromise lawn health. To make this process effortless, I use a digital pressure gauge, which provides quick, accurate readings—saving me hours of trial and error. As irrigation systems evolve, I predict that automation and AI-driven management will become standard, making yard maintenance even more straightforward. For now, embracing zone tuning—this technique will drastically improve efficiency—is a game-changer.

How do I keep my irrigation system performing over time?

Consistent maintenance of irrigation components is crucial. I schedule quarterly cleanouts of emitters and valves to prevent clogging. Additionally, I check for leaks or pressure drops that might indicate worn-out parts. Using high-quality replacement parts from reputable brands ensures durability and optimal performance. Technology like moisture sensors and smart timers, which I’ve integrated into my setup, can adapt watering schedules based on real-time conditions, extending the lifespan of your system and promoting healthier grass. For more insights on avoiding irrigation pitfalls, consider consulting resources like these hidden signs of leaks.

Remember, the key is consistency. With the right tools and periodic checks, your yard will not only look great but also stay healthy with minimal effort. To elevate your maintenance game further, challenge yourself to try advanced zone calibration this month—it’s a small step that pays big dividends in yard health. As industry experts predict, smarter, sensor-driven irrigation management will dominate the scene by 2026, making yard care more automated and efficient. Dive into this trend now to stay ahead.

Over the years, one thing I’ve learned is that the journey to a beautiful yard isn’t just about quick fixes; it’s about embracing smart, strategic approaches that yield lasting beauty and health. My personal experiences have shown me the importance of patience, continuous learning, and leveraging the right resources. For instance, I once tried a DIY sod installation without proper soil prep, which led to uneven growth and frustration. That taught me the crucial lesson of thorough groundwork. Similarly, I discovered that regular irrigation system checks saved me hours of troubleshooting and kept my lawn vibrant year-round. These lessons have reshaped my approach, turning yard care from a dreaded chore into a rewarding hobby. Ultimately, investing time in understanding nuanced techniques and trusted tools transforms routine maintenance into a crafting process—bringing your ideal outdoor space within reach faster and more reliably than you ever imagined.